In a previous post, I laid out detailed steps on how to connect to Microsoft Graph API using PowerShell. This is using the PowerShell SDK running on a machine that’s not in Azure. This method uses a client secret or certificate along with a App registration. This is a solid method for this use case, however, managing certificates or especially secrets can be a bit of a pain. With that said, what if we wanted to take it a step further and not use secrets and/or certificates at all? This article is going to focus on how to connect to Graph API using a Managed Identity in an Automation Runbook.
Table Of Contents
What is a Managed Identity?
An Azure managed identity is a feature of Azure Active Directory that enables Azure services to authenticate to cloud resources securely. It eliminates the need for you to store and manage the credentials for your applications and services, and helps you to follow the principle of least privilege by providing just-in-time access to resources.
There are two types of managed identities:
-
These identities are created when you enable the managed identity feature for an Azure resource and are tied to the lifecycle of that resource. When the resource is deleted, the managed identity is also deleted.
-
These identities are created independently of an Azure resource and can be assigned to multiple resources. This allows you to manage the identity in a central location and reuse it across multiple resources.
Using a managed identity can help you secure your application and make it easier to manage the authentication process since you no longer have to manage secrets or credentials in your code. For this article, we’re going to focus on using a system-assigned managed identity that’s created in the Azure Automation account.
Check out the Microsoft docs to learn more about managed identities
Requirements
In order to use an Azure managed identity, you need to ensure you meet the following requirements.
- An Azure subscription
- A Resource Group with Owner or user access administrator roles
- An Azure Automation Account
- The managed identity must be in the same region as the Automation Runbook
- This also applies to other Azure resources as well
Enable a Managed Identity for Azure Automation
Now that we have the requirements in place, let’s go ahead and start the process to enable a managed identity for Azure Automation. We’re going to assume you have already created an Automation account in your subscription.
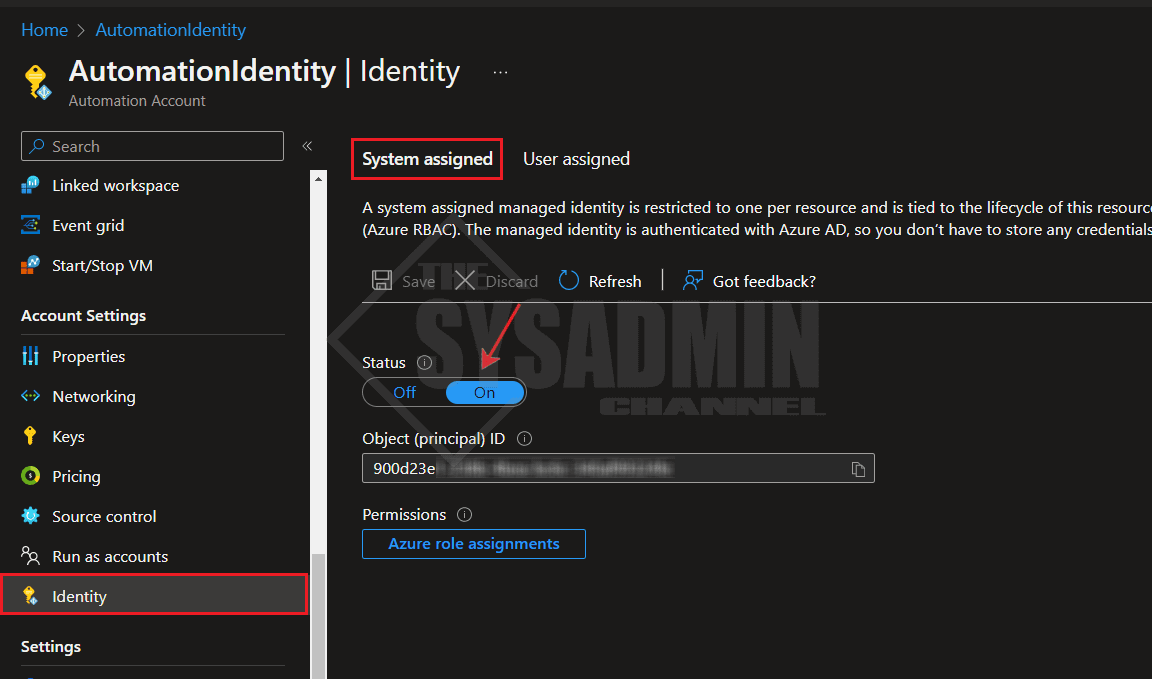
Within your automation account:
- Click on Identity on the left pane
- Ensure the System assigned tab is selected
- Toggle the status from “Off” to “On”
- Copy the object (principal) Id to a notepad. We’ll need it later
- Click save
Grant Permissions to a Managed Identity
When a managed identity is created, it starts off with a clean slate and no permissions. This means that you will need to grant permissions to the resources that it needs to interact with.
In our example, we need to grant the managed identity from our Automation account access to read as well as run jobs from the Azure Automation Runbook. We can do this from the “Azure role assignments” button on the Identity blade, but I like to use PowerShell because it’s a lot faster.
  $ServicePrincipalId = '900d23ex-xxxx-xxxx-xxxx-xxxxxxxxxxxx' #Copied from the Identity blade above
  $ResourceGroupName = 'rg-azure-automation'
  New-AzRoleAssignment -ObjectId $ServicePrincipalId -ResourceGroupName $ResourceGroupName -RoleDefinitionName Reader
  New-AzRoleAssignment -ObjectId $ServicePrincipalId -ResourceGroupName $ResourceGroupName -RoleDefinitionName 'Automation Job Operator'
  New-AzRoleAssignment -ObjectId $ServicePrincipalId -ResourceGroupName $ResourceGroupName -RoleDefinitionName 'Automation Runbook Operator'
More importantly, we need to know how to grant the managed identity permissions to Graph API (most common) or other app role resources that you may need. Since Azure Automation Runbooks don’t require a secret or certificate to connect to Graph API, this is ideal and the most secured way since we’re letting Azure handle all the authentication process in the cloud.
#New Service Principal Permissions using Azure AD module
$ServicePrincipalId = '900d23ex-xxxx-xxxx-xxxx-xxxxxxxxxxxx'
$GraphResource = Get-AzureADServicePrincipal -Filter "AppId eq '00000003-0000-0000-c000-000000000000'"
$Permission = $GraphResource.AppRoles | Where-Object {$_.value -eq 'User.Read.All'}
New-AzureADServiceAppRoleAssignment -ObjectId $ServicePrincipalId -PrincipalId $ServicePrincipalId -Id $Permission.Id -ResourceId $GraphResource.ObjectId


#New Service Principal Permissions using Graph API
$ServicePrincipalId = '900d23ex-xxxx-xxxx-xxxx-xxxxxxxxxxxx'
$GraphResource = Get-MgServicePrincipal -Filter "AppId eq '00000003-0000-0000-c000-000000000000'"
$Permission = $GraphResource.AppRoles | Where-Object {$_.value -eq 'User.Read.All'}
New-MgServicePrincipalAppRoleAssignment -ServicePrincipalId $ServicePrincipalId -PrincipalId $ServicePrincipalId -AppRoleId $Permission.Id -ResourceId $GraphResource.Id
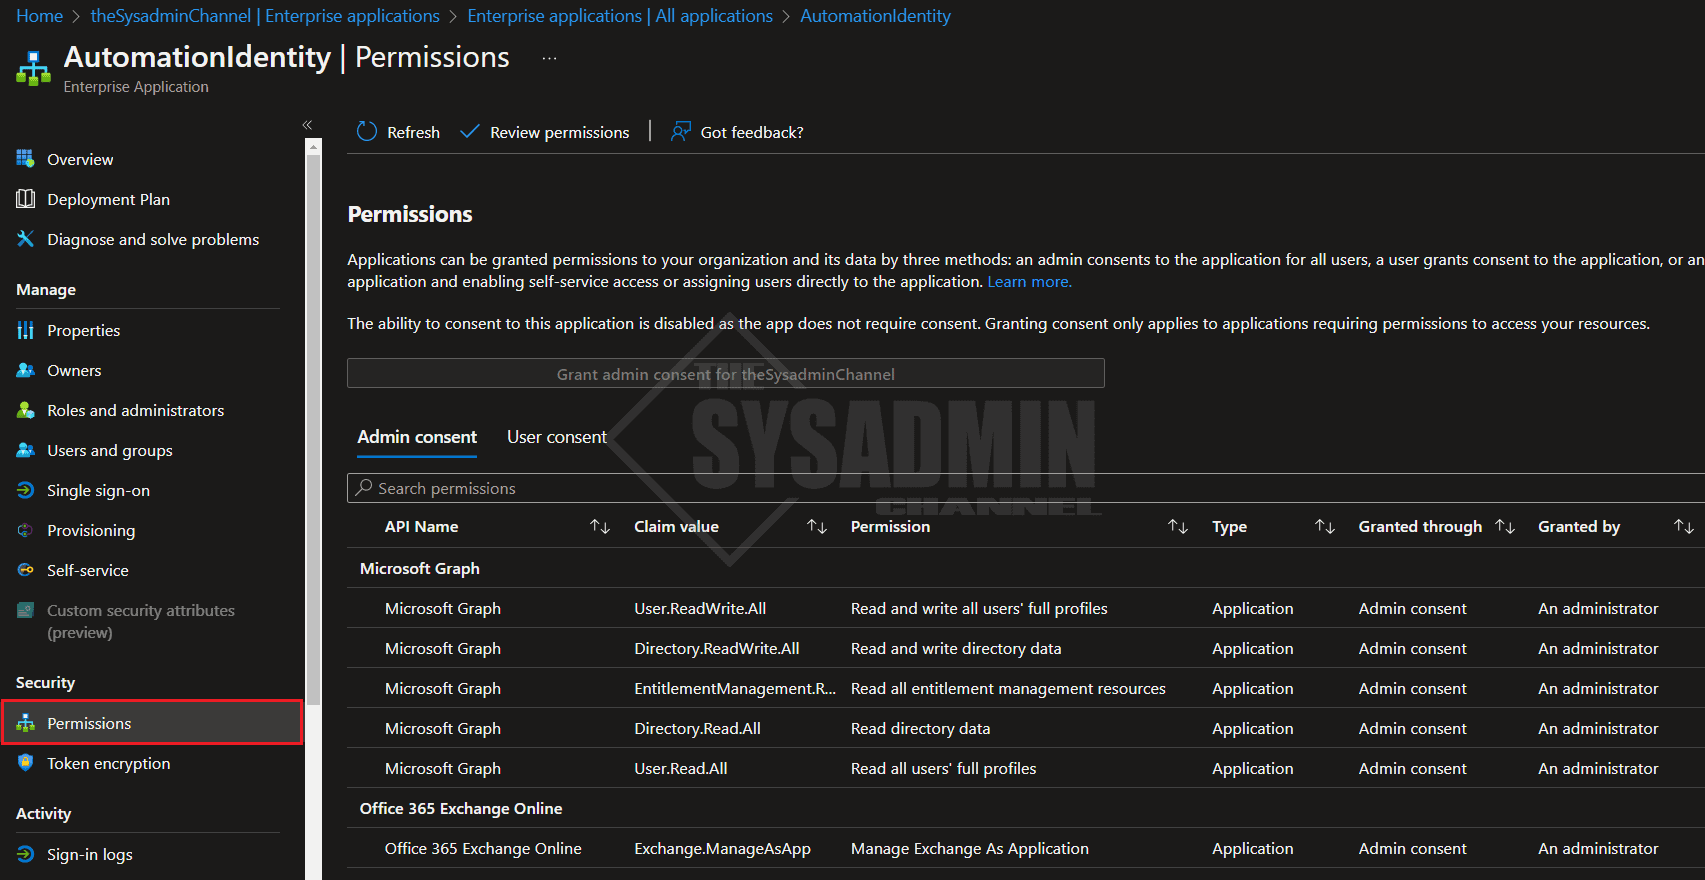
To view the permissions that are currently granted for a Service Principal, you can go to
- Azure AD
- Enterprise Applications
- Application Type == Managed Identity
- select the Service Principal
- select Permissions on the left scroll panel
Connect to Graph API using a Managed Identity in an Automation Runbook
Alright folks! We’ve added permissions to the managed identity to access resources in our resource group as well as added permissions to access/modify objects in Graph API. All that’s left is actually connecting to Graph API.
To make this happen, we’ll first need to have the Microsoft.Graph PowerShell module added under the modules for your automation account. If you’re using a Hybrid worker account and running the script on-premises, you’ll need to install the module on the on-premises machine that’s running the script.
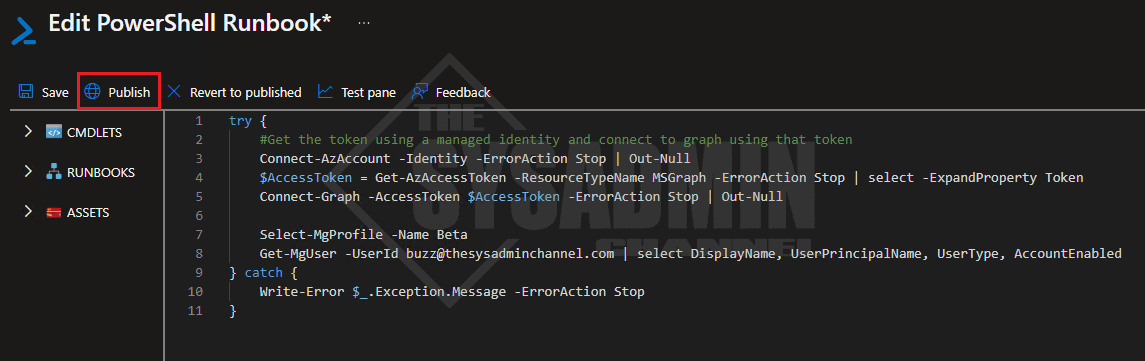
In your Automation Runbook, edit the page and add these few lines. If you’re using parameters, be sure to add it after the param block. When you’re ready to publish, hit the publish button so it saves and publishes the script.
try {
    #Get the token using a managed identity and connect to graph using that token
    Connect-AzAccount -Identity -ErrorAction Stop | Out-Null
    $AccessToken = Get-AzAccessToken -ResourceTypeName MSGraph -ErrorAction Stop | select -ExpandProperty Token
    Connect-Graph -AccessToken $AccessToken -ErrorAction Stop | Out-Null

    Select-MgProfile -Name Beta
    Get-MgUser -UserId [email protected] | select DisplayName, UserPrincipalName, UserType, AccountEnabled
} catch {
    Write-Error $_.Exception.Message -ErrorAction Stop
}
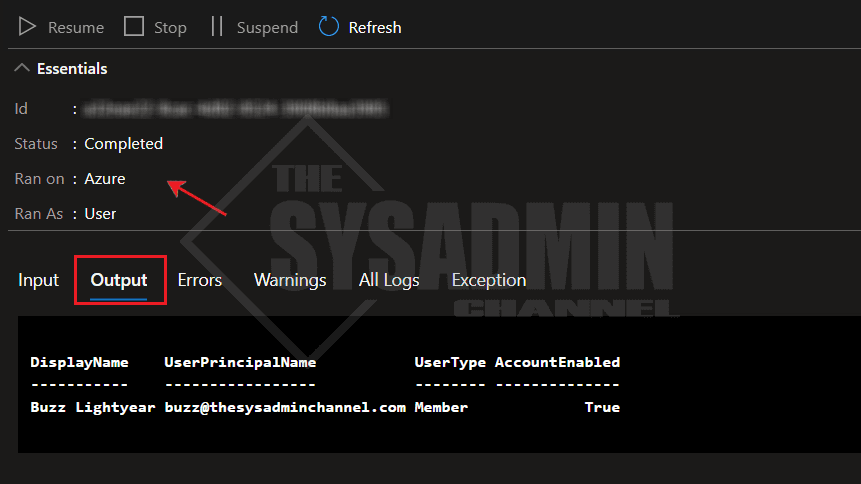
We’ve published the script so let’s trigger it. You can trigger this by using the Start button in the Runbook, or trigger it from a Logic App. Either way, once it has completed running, it should display the output in the job details.
If you don’t see the output, be sure to check the Errors or Exception tabs to see where it failed.
Conclusion
Hopefully this article was able to help you connect to Graph API using a Managed Identity in an Automation Runbook. This method works great if you’re running the Runbook from Azure as well as a Hybrid Worker machine (on-premises machine).
There is no Connect-Graph cmdlet. Maybe Connect-MgGraph?
Is it possible to do this using Delegated permissions? I need to use “ChannelMessage.Send” now that MS is killing off webhooks, and the Application Permissions are only usable for migration.
$GraphResource.AppRoles | Where-Object {$_.value -eq ‘User.Read.All’} – this line does not show the permission, it only shows application permissions.
Hello
You should mention that the deployment of the Microsoft.Graph.Authentication module to your resource group is necessary.
https://learn.microsoft.com/en-us/answers/questions/1457621/mggraph-is-not-recognized-as-a-name-of-a-cmdlet-fu