What is Credential Guard ?
Credential Guard is a feature introduced in Windows 10 Enterprise and Windows Server 2016 that essentially protects your machine from attacks such as pass the hash and other potential credential theft threats. It uses what’s called virtualization-based security to isolate secrets so that only privileged system software can access them. In other words, this creates a “bubble” so that only key processes have access and separates regular Operating System processes from having access to it. Credential Guard must be turned on and deployed in your organization since it is not enabled by default.
Enable Credential Guard via GPO (Group Policy)
- Open Group Policy Management Console (GPMC) or GPEdit.msc for a local machine
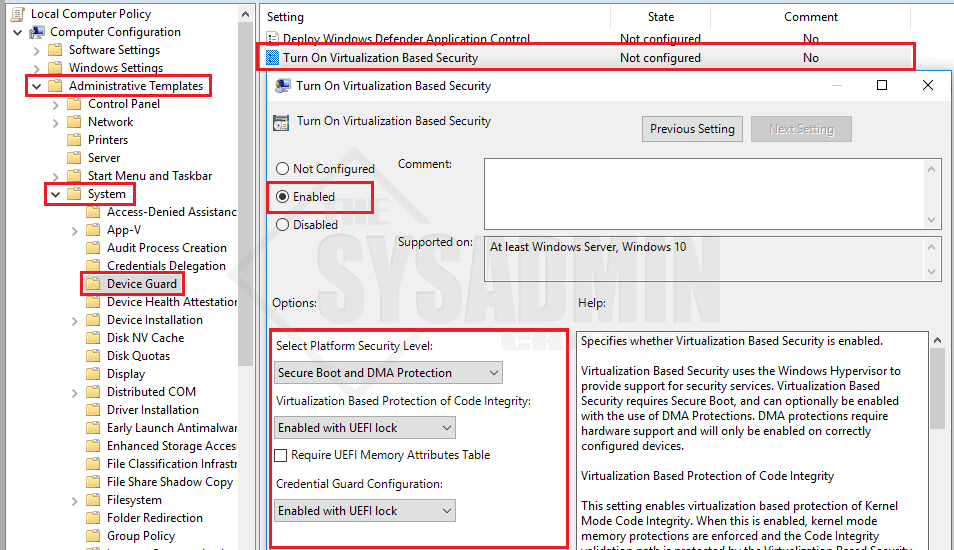
- Go to Computer Configuration -> Administrative Templates -> System -> Device Guard
- Double click on Turn On Virtualization Based Security
- Select Secure Boot and DMA Protection
- Select Enabled with UEFI lock on both the code integrity and credential guard configuration settings
- Click Ok and close out of GPMC
“Enabled with UEFI lock” allows it so the setting cannot be disabled remotely. Also, if the Group Policy setting is not found, you will need to update your ADMX templates to Server 2016.
As always, don’t forget to check out our Youtube Channel for more sysadmin video content and awesome how-to’s.