As a Sysadmin, you might come across a scenario where someone comes to you and says, so-and-so sent an email but I never received it. Or I sent so-and-so an email and I want to confirm that it was delivered. For these types of questions, it’s best to use Message Trace in Office 365 Exchange Online to get an accurate answer from a systems standpoint.
There are ways to check in the GUI and ways to check in Powershell way for CLI folks like myself. We’ll go over both methods in this article.
Requirements
As far as requirements go, we’ll lay them down here so you can have success when using this immensely useful tool.
- Global Administrator -or Exchange Administrator Role
- Information to query. SenderAddress -or RecipientAddress -or MessageId -or MessageTraceId
How to use Message Trace in Exchange Admin Center (GUI)
To achieve this, open your favorite browser and navigate to Exchange Online. There are 2 commonly known portals at this time:
- Classic Portal Direct Link: https://outlook.office365.com/ecp/
- Newest Portal Direct Link: https://admin.exchange.microsoft.com/#/messagetrace
In this example we’ll use the new portal.
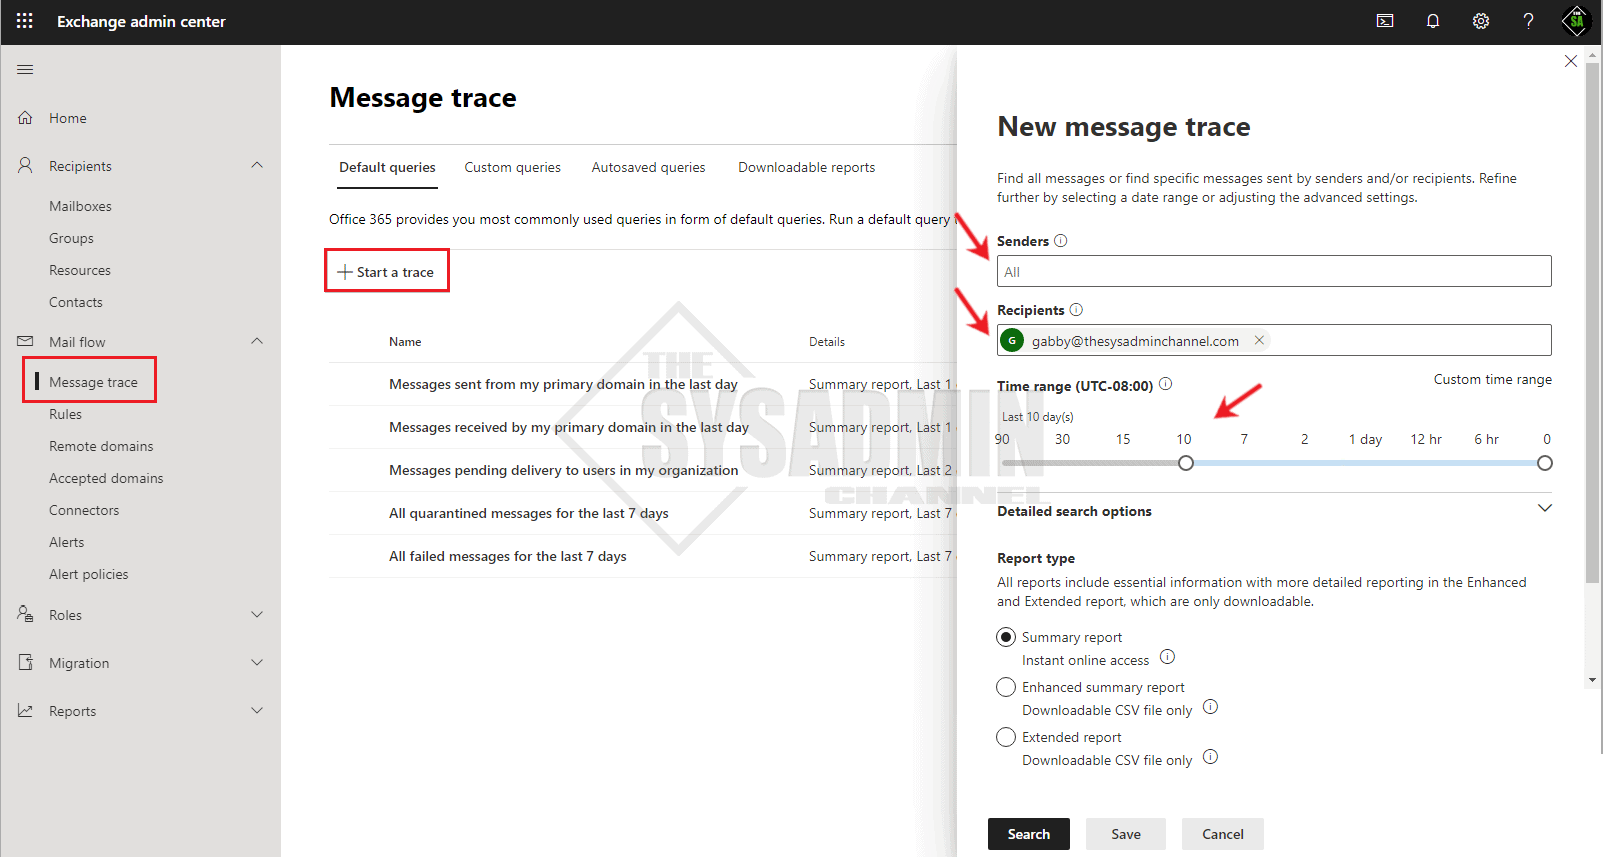
- Once you’re in the Message Trace blade, click start a trace and a side panel will popup.
- Populate the Sender and/or Recipients you would like to check
- Select how many days you would like the search to check. Anything 10 days or newer, it is immediately accessible. Searches older than 10 days will be sent via email
- Select Summary Report
- Click Search
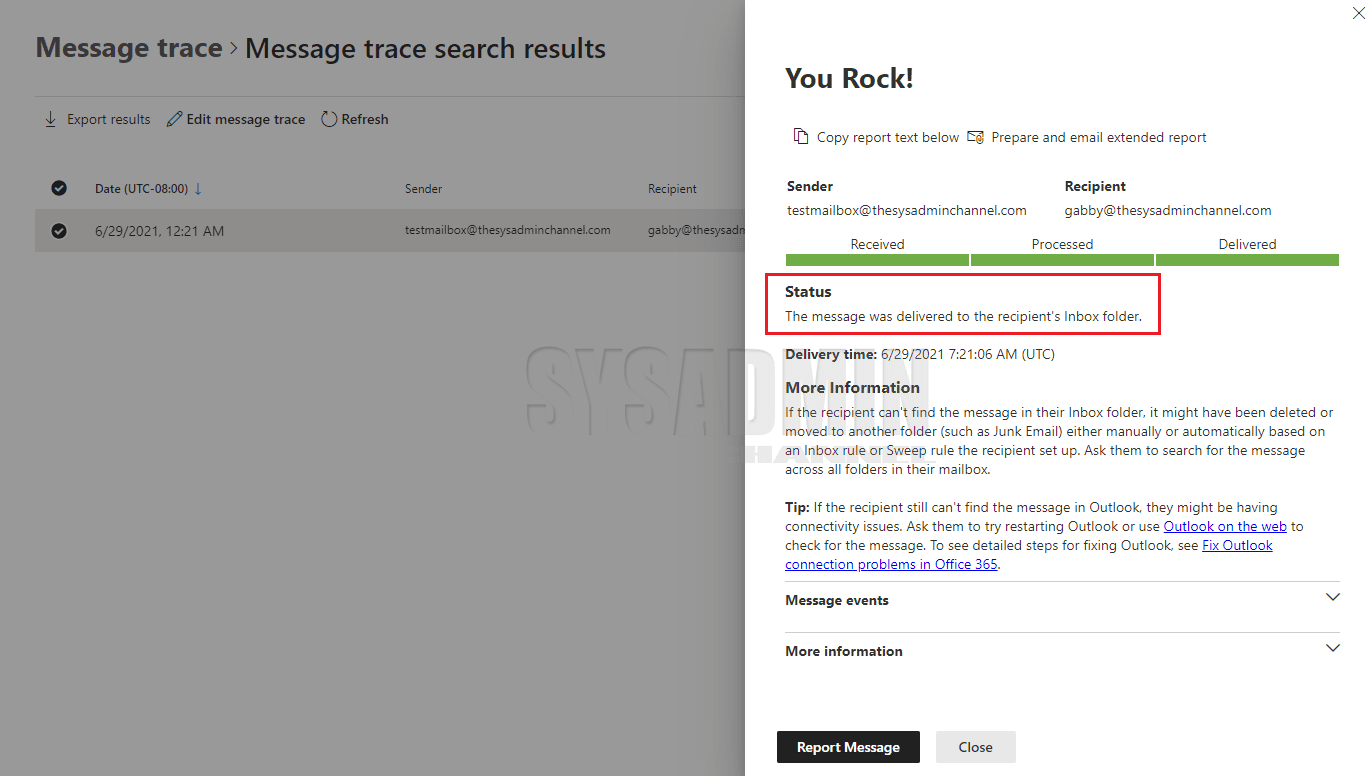
Once you get the data back from the message trace, take note of the message status. In this case, it will show “The message was delivered to the recipient’s Inbox folder.” In other cases, it will show SPAM or if they have mailbox rules in place the message will show the folder that it was delivered in. Pretty neat.
How to use Message Trace in Powershell
The tool of preference for me will always be Powershell over a GUI because it lends it self to being more scalable. I’m also in the CLI most of the so it saves time from clicking into multiple windows to get to where I need.
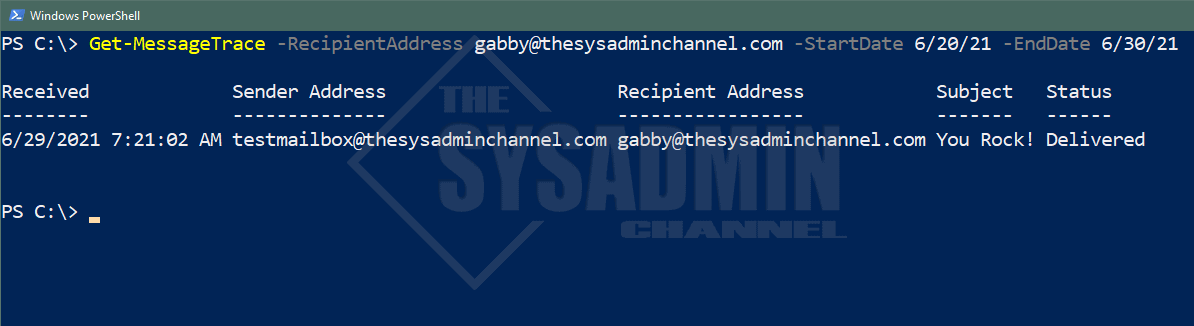
Just like in the GUI, you’ll need basic information to run proper searches. Also, one thing to note here is that Get-MessageTrace only runs the last 48 hours by default. If you need to search emails from 2-10 days you’ll need to use the -StartDate and -EndDate parameters. Here is an example of how to run the command in Powershell.
#Get all emails sent to Gabby over the past 10 days.
Get-MessageTrace -RecipientAddress [email protected] -StartDate 6/20/21 -EndDate 6/30/21
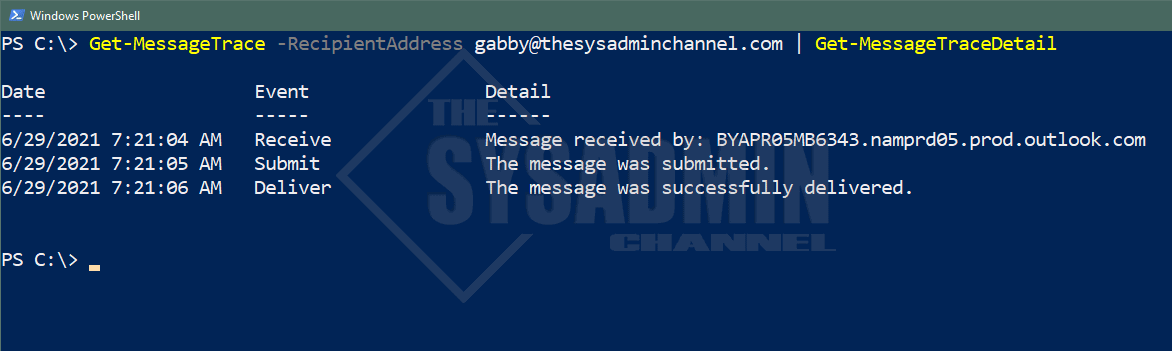
If you want to get additional information from the email you can pipe it to Get-MessageTraceDetail to give you more detail on what’s going on under the hood.
#Get the message trace detail sent to Gabby over the past 10 days.
Get-MessageTrace -RecipientAddress [email protected] | Get-MessageTraceDetail
Get all the Recipients an Email was Sent to
Another use case is to determine who are all the recipients an email was sent to. This is actually going to be a 2-step process and we’ll go over those as well.
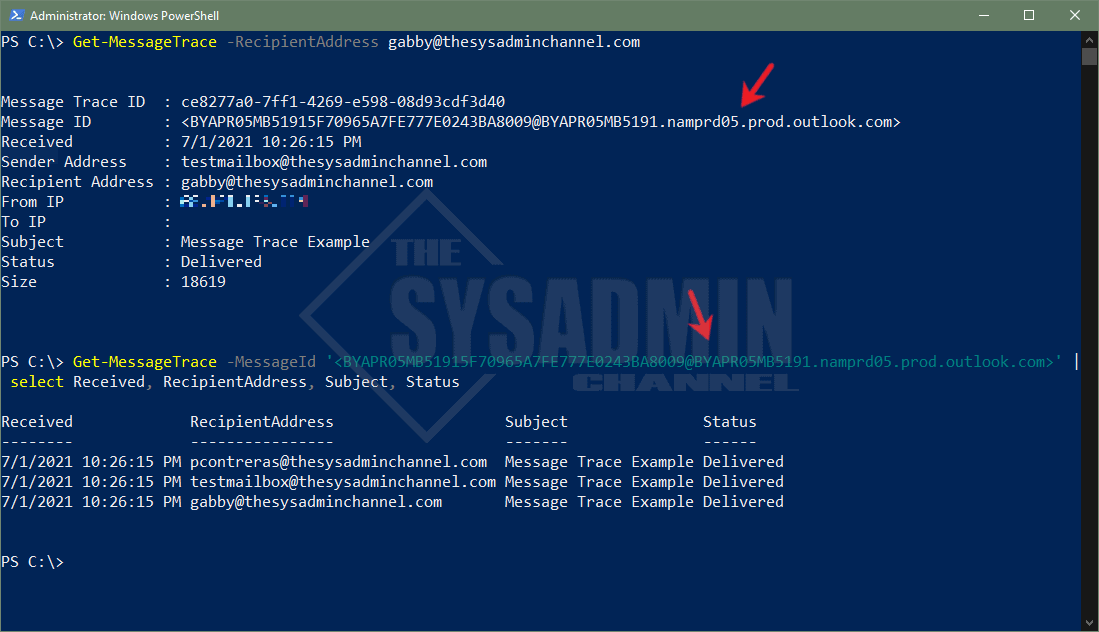
First we’ll need to get the MessageId from one of the recipients, an example is just like the one mentioned above. For the sake of testing, we’ll use another email to get the hang of everything.
#Get the message trace detail sent to Gabby over the past 10 days.
PS C:\> Get-MessageTrace -RecipientAddress [email protected]


Message Trace ID  : ce8277a0-7ff1-4269-e598-08d93cdf3d40
Message ID        : <BYAPR05MB51915F70965A7FE777E0243BA8009@BYAPR05MB5191.namprd05.prod.outlook.com>
Received          : 7/1/2021 10:26:15 PM
Sender Address    : [email protected]
Recipient Address : [email protected]
From IP           : xxx.xxx.xxx.xxx
To IP             :
Subject           : Message Trace Example
Status            : Delivered
Size              : 18619


PS C:\> Get-MessageTrace -MessageId '<BYAPR05MB51915F70965A7FE777E0243BA8009@BYAPR05MB5191.namprd05.prod.outlook.com>' |
 select Received, RecipientAddress, Subject, Status

Received             RecipientAddress                   Subject               Status
--------             ----------------                   -------               ------
7/1/2021 10:26:15 PM [email protected]  Message Trace Example Delivered
7/1/2021 10:26:15 PM [email protected] Message Trace Example Delivered
7/1/2021 10:26:15 PM [email protected]       Message Trace Example Delivered
Conclusion
Hopefully this article was useful enough to show you how to use Message Trace in Office 365 Exchange Online to give you some insight on how to confirm receipt of a message. It also allows you to see how an email was sent to by using the MessageId.
If you want to view more content be sure to check out Exchange Online. If you prefer video content, check out our Youtube Page.