Through out my sysadmin journey I’ve always been an advocate of implementing as much automation as possible. Whether I automate Powershell Scripts with Task Scheduler or create a function to run interactively in the shell. I believe to the core that I should always strive to automate myself out of a job.
Today we’re going to focus on what is Windows Task Scheduler, but more importantly how to run Powershell scripts from Task Scheduler to automate your tasks. There are a couple of caveats I’ve learned over the years but we’ll get into that later in the article.
What is Task Scheduler?
I suppose before we get into the details of how to run Powershell scripts as a scheduled task, it would be a good idea to explain exactly what Task Scheduler is.
So what is Task Scheduler? Wikipedia explains Task Scheduler as a component of Microsoft Windows that provides the ability to schedule the launch of programs or scripts at pre-defined times or after specified time intervals.
In other words, it’s a way to schedule jobs or certain tasks at specific time intervals throughout the day, week, month or as a one time basis.
Task Scheduler is available on Windows Server and Windows Client machines. i.e Windows Server 2016/2019 and Windows 10
How To Automate Powershell Scripts with Task Scheduler
Now that you know what is it, let’s move on to how you can use it to your advantage. The first step is knowing what we’ll want to automate (or schedule). In my example I’m going to automatically email my users once their password is within 10 days of expiration. Luckily, we already have a Get Password Expiration Date Powershell script so now it’s just a matter setting up a task.
Let’s get to that now.
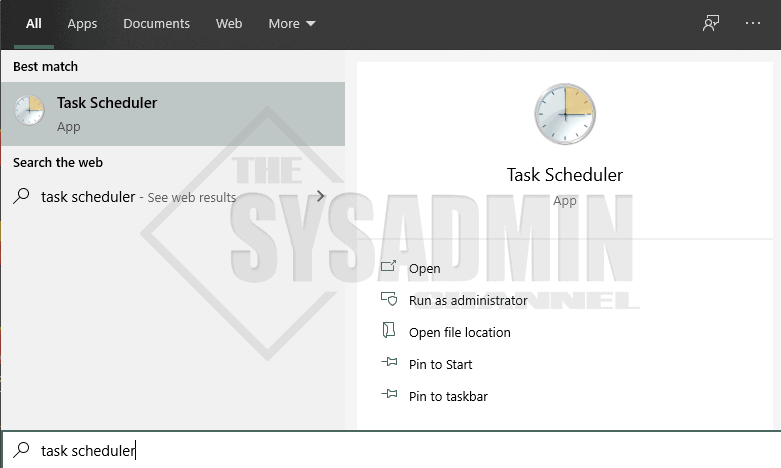
- First, we’ll need to open Task Scheduler from the start menu
- Choose the path you want to setup the task. I normally choose the root
- Right click Task Scheduler Library and select Create Task (not basic task)
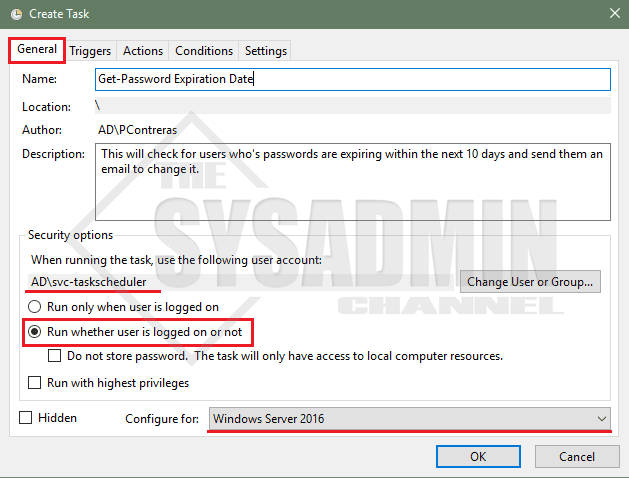
- Under the General tab, insert the Name and Description
- Set the user account (preferably a service account with a password that doesn’t expire)
- Check the option to run whether the user is logged in or not
- Configure the dropdown to use the latest version
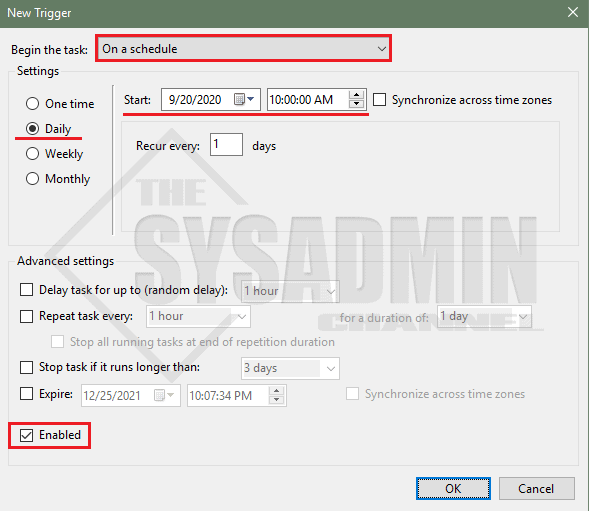
- Under the trigger tab, select on a schedule for time based tasks
- Select the time frequency. One time, daily, weekly or monthly
- Since we want the task to run daily, I’ll set it recur every 1 days
- Under the advance settings, if you want to run the task every x hours, enter that in there (i.e. 12 hours for the duration of 1 day will run every 12 hours until you disable it)
- Ensure the check for Enabled is checked
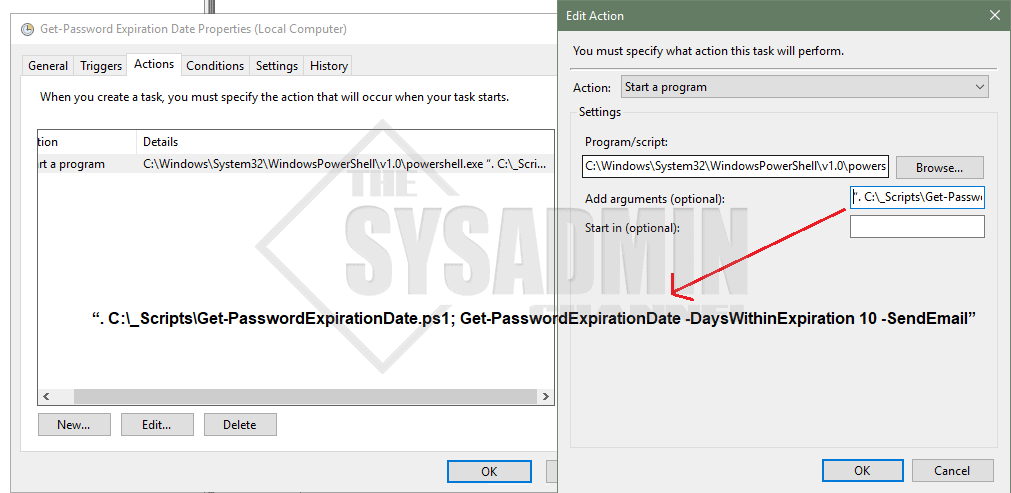
- Under the Actions tab, select start a program in the drop down menu
- Under program/script select the powershell.exe. (i.e. c:\Windows\System32\WindowsPowerShell\v1.0\powershell.exe)
- Under Add arguments, select the location of the Powershell script (i.e. c:\_Scripts\Get-PasswordExpirationDate.ps1)
“. C:\_Scripts\Get-PasswordExpirationDate.ps1; Get-PasswordExpirationDate -DaysWithinExpiration 10 -SendEmail” –Including quotes
- Under Conditions tab, leave default unless you want to change anything specifically
- Under Settings tab, check Allow task to be run on demand
- Click OK and enter password for the account running the task
Granting Logon as batch job rights
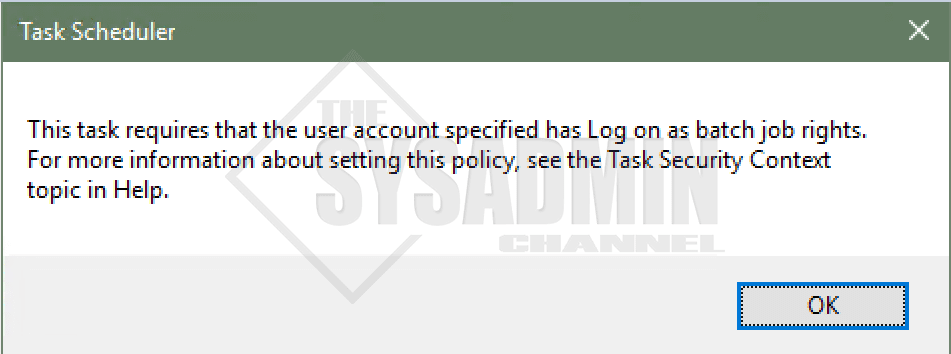
If the account you’re using to run the scheduled task is not an administrator, you might be prompted with the following message. “This task requires that the user account specified has Log on as batch job rights…
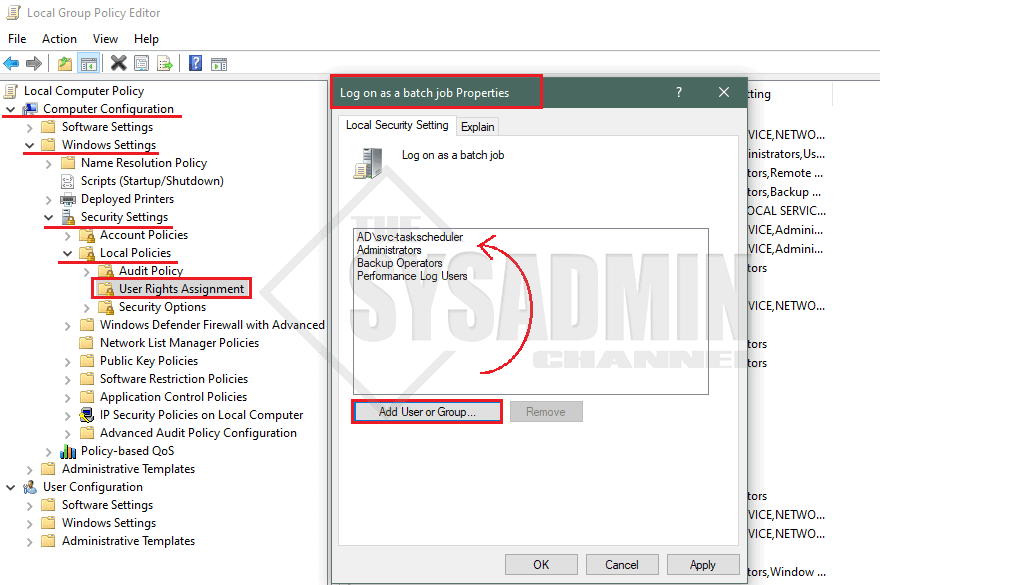
To fix that we’ll do the following:
- Go to start -> Type gpedit.msc
- Navigate to Computer Configuration -> Windows Settings -> Security Settings -> Local Policies -> User Rights Assignment
- Open Log on as a batch job and add the user account
When should you use Task Scheduler?
Honestly there are a ton of use cases for using Task Scheduler and the possibilities are pretty much unlimited. I would define it as anything that you can script and you want to run more than once in a specific time interval. Off the top of my head, a perfect example would be get password expiration dates using Powershell and automatically notify the user. Another good use case is automatically reboot a server after deploying windows updates using SCCM.
It really just depends on what you want to do. There was a point in time where I had about 50+ jobs scheduled through out the week. Anything from Exchange Online to Active Directory tasks, if I was able to script it (and I usually can) I would setup a job to automate it.
Automate Powershell Scripts – Conclusion
At this point I really hope I was able to explain, in detail, how to automate your Powershell scripts with task scheduler so you can hopefully set it and forget it. If you’re not using task scheduler, let me know in the comments what you are using to run your jobs. Again, I strive to automate myself out of a job so it’s very helpful that I’m to run jobs essentially while I am sleeping. This frees up time for me to try and automate more items or look for ways to enhance the environment on other technologies.
If you liked this article, be sure to check out our other Server Administration posts. I recently uploaded a Get Reboot History Powershell Script that could be useful. While you’re at it, don’t forget to stop by our YouTube Channel for awesome video content.