In this quick guide we’ll go over the steps to create office 365 user accounts in Powershell using the New-MsolUser cmdlet. If you’re not familiar with New-MSolUser, take a quick glance on Microsoft’s page to get a little more detail. If not, no need to worry because we’ll provide the script you need to easily automate your O365 accounts. Before we begin you just want to make sure you’re able to connect to MSOnline using Powershell, and in order to do that you will need to install the MSOnline Module.
Install MSOnline Powershell Module
This is a one time install so if you’ve already installed the module, you’re already ahead of the game. If not, follow the steps below.
- Open up an administrative Powershell window.
- Type
Install-Module MSOnline. - If prompted to install the NuGet provider, type Y and press ENTER.
- If prompted to install the module from PSGallery, type Y and press ENTER
Another prerequisite would be to set your execution policy to remote signed. This is so Powershell can allow scripts to run on your PC. Although it seems very obvious, I should also mention that in order to create these accounts you will need to appropriate permissions for Exchange Online.
Create Office 365 User Accounts in Powershell
<#
.Synopsis
    This script will create single user accounts for Office365 using the New-MSolUser cmdlet.
    For updated help and examples refer to -Online version.


.DESCRIPTION
    This script will create single user accounts for Office365 using the New-MSolUser cmdlet.  This is not intended for On-Prem user accounts.
    For updated help and examples refer to -Online version.


.NOTES
    Name: Create-O365SingleUserAccountMsol
    Author: The Sysadmin Channel
    Version: 1.0
    DateCreated: 2018-Mar-15
    DateUpdated: 2018-Mar-15

.LINK
    https://thesysadminchannel.com/create-office-365-user-accounts-new-msoluser-powershell -


.EXAMPLE
    For updated help and examples refer to -Online version.
#>

cls
$Creds = Get-Credential -Message "Enter in your O365 credentials"
Connect-MsolService -Credential $Creds


$FirstName = Read-Host "Enter in the First Name"
Write-Host
$LastName = Read-Host "Enter in the Last Name"
Write-Host
$DisplayName = "$FirstName $LastName"

$UsageLocation = Read-Host "Enter in the 2 letter country code for the license"
Write-Host
#$LicensePack = "contoso:ENTERPRISEPACK"  #uncomment this line out if you know which license you want use. Type Get-MsolAccountSku to find available licenses.
#Write-Host

#Getting domain from Get-MSolDomain cmdlet and filtering out .onmicrosoft.com.
#if a domain is not found, it will revert to the onmicrosoft.com domain

$Domain = Get-MsolDomain | Where-Object {($_.Name -notmatch ".onmicrosoft.com") -and ($_.Status -eq "Verified") -and ($_.Authentication -eq "Managed")} | select -ExpandProperty Name
if (-not $Domain) {$Domain = Get-MsolDomain | Where-Object {($_.Name -match ".onmicrosoft.com") -and ($_.Status -eq "Verified") -and ($_.Authentication -eq "Managed")} | select -ExpandProperty Name}


$i = 1
$UserPrincipalName = $FirstName.Substring(0,$i) + $LastName + "@$Domain"


cls
Write-Host "======================================="
Write-Host
Write-Host "Firstname:      $firstname"
Write-Host "Lastname:       $lastname"
Write-Host "Display name:   $DisplayName"
Write-Host "Location:       $UsageLocation"
Write-Host "Username:       $UserPrincipalName"
Write-Host "Domain:         $Domain"


#Checking if account currently exists.
DO {
   if ([bool](Get-MsolUser -UserPrincipalName $UserPrincipalName -EA SilentlyContinue)) {
        Write-Host "WARNING: Logon name" $UserPrincipalName.toUpper() "already exists!!" -ForegroundColor:Green
        $i++
        $UserPrincipalName = $FirstName.Substring(0,$i) + $LastName + "@$Domain"
        Write-Host
        Write-Host
        Write-Host "Changing Logon name to" $UserPrincipalName.toUpper() -ForegroundColor:Green
        Write-Host
        $taken = $true
        sleep 4
   } else {
    $taken = $false
    }
} Until ($taken -eq $false)
$UserPrincipalName = $UserPrincipalName.ToLower()
Sleep 3

cls
Write-Host "======================================="
Write-Host
Write-Host "Firstname:      $firstname"
Write-Host "Lastname:       $lastname"
Write-Host "Display name:   $DisplayName"
Write-Host "Location:       $UsageLocation"
Write-Host "Username:       $UserPrincipalName"
Write-Host "Domain:         $Domain"

Write-Host "Continuing will create O365 Account." -ForegroundColor:Green
Write-Host
$Proceed = $null
$Proceed = Read-Host "Continue? (y/n)"

    if ($Proceed -ieq 'y') {
            New-MsolUser -DisplayName $DisplayName -FirstName $FirstName -LastName $LastName -UserPrincipalName $UserPrincipalName -UsageLocation $UsageLocation #-LicenseAssignment $LicensePack
            Sleep 5

            Get-MsolUser -UserPrincipalName $UserPrincipalName

        } else {
            Write-Host "User opted to cancel"
    }
What Does This Script Do And How Does It Work
Once you run the script, you’re going to be immediately presented with credentials to connect to MSOnline. Enter in your credentials as a [email protected] format. Once you pass in those creds it will automatically connect your online tenant.
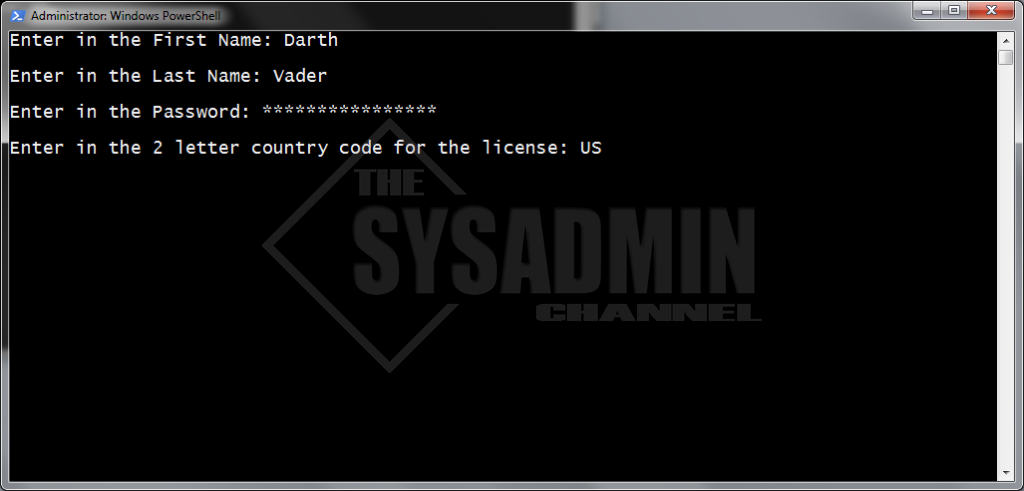
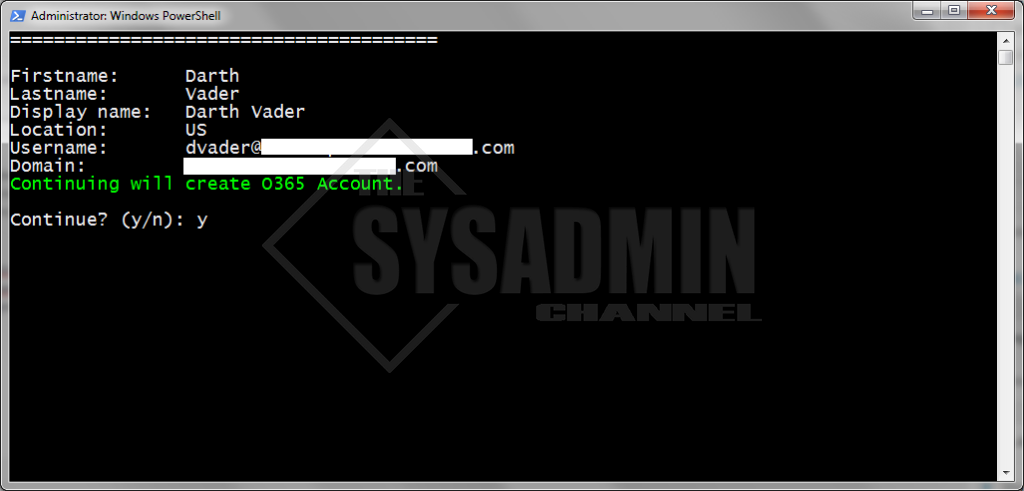
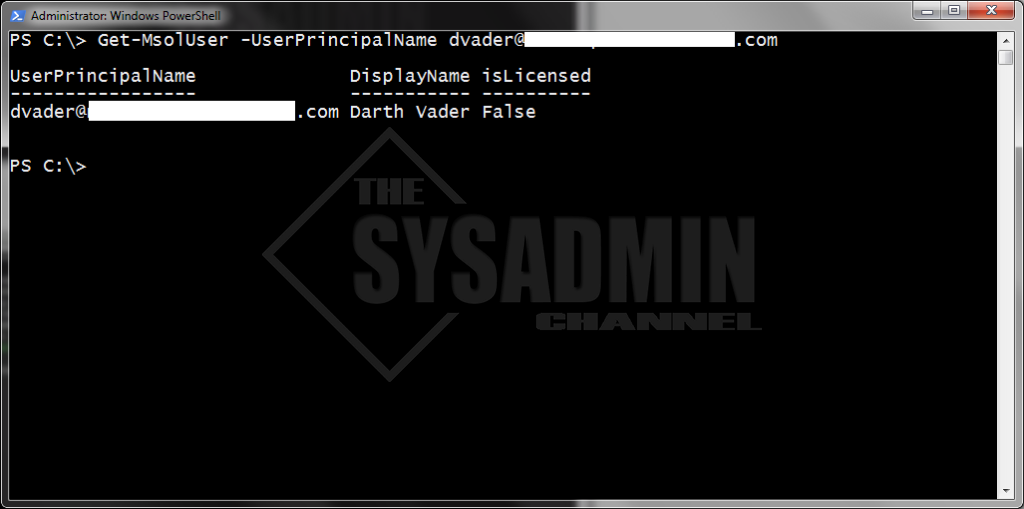
From there you will be presented with the first name, last name and location. Once it grabs all that information, it will automatically try to find your domain (not the onmicrosoft.com one) and set the UserPrincipalName as the first-initial of the first name and the last name. So for example if my user was Darth Vader, the UserPrincipalName would be set to DVader. If a user with that UPN already exists, it will append a letter to the first name. e.g. DaVader.
Hopefully this script was able to ease your process and help you to Create Office 365 User Accounts. If you would like more awesome sysadmin content, be sure to check out our Youtube Channel for video demos and other cool sysadmin stuff.


