It has become today’s best practice to be able to utilize groups to assign Office 365 / Azure AD licenses. Today we’re going to share how to assign group based licensing in Azure AD.
The first question that might come to mind is what would be the main reason for provisioning licenses this way, and the answer is that it is extremely versatile and can easily be automated. Unlike direct license assignments, you can easily export the members of a group as well as see if there are any license conflicts in the portal.
Pros and Cons of Azure AD Group Based Licensing
-Pros
- End to end automation is easier vs direct assignments
- It utilizes groups, so Jr. admins can modify assignment by adding/removing from group
- Limit the amount of License Administrator Roles in your Org
- Easily export members of the group to determine license assignment
- Reduces the chances of accounts having orphaned licenses
- Easily determine license conflicts in the Portal
-Cons
- The need to Reprocess licenses if there are any conflicts
- Adding a user to a conflicting group might cause license issues. e.g adding F3 and E3
Office 365 License Group Assignment Requirements
There are some requirements you need to satisfy in order to make this work.
- A Global Administrator in your tenant to apply the license
- Paid or trial subscription for Azure AD Premium P1 and above
- Paid or trial edition of Office 365 Enterprise E3 or Office 365 A3 or Office 365 GCC G3 or Office 365 E3 for GCCH or Office 365 E3 for DOD and above
How To Assign Group Based Licensing in Azure AD
In order to assign office 365 license based on group membership you’ll need to go head on over to Azure because that’s where the setting is actually located. Let’s jot down exactly the steps to assign office 365 license to group.
- In your favorite browser, navigate to https://portal.azure.com -> Azure Active Directory -> Groups
- Search for the group you would like to assign a license to, in my case I’ll use ‘GroupLicense – PowerAutomate’
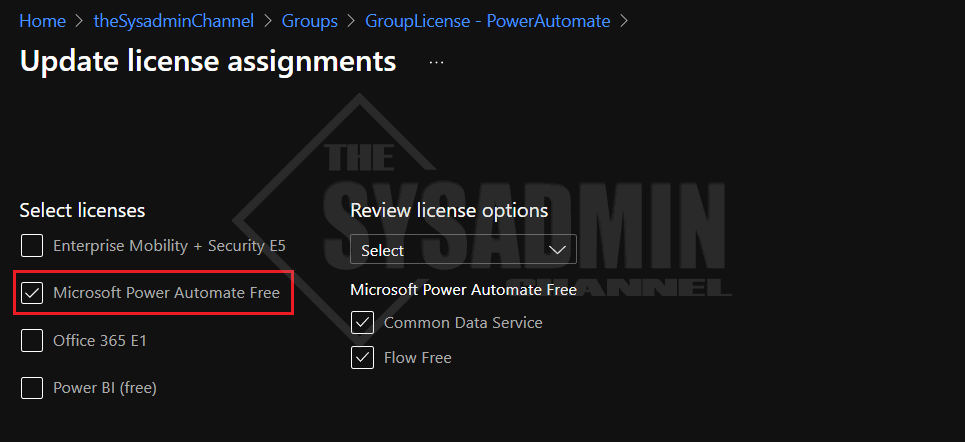
- Click on Licenses -> Assignments

- A list of available licenses will show up, choose the one you would like to assign
- Click Save to apply the setting
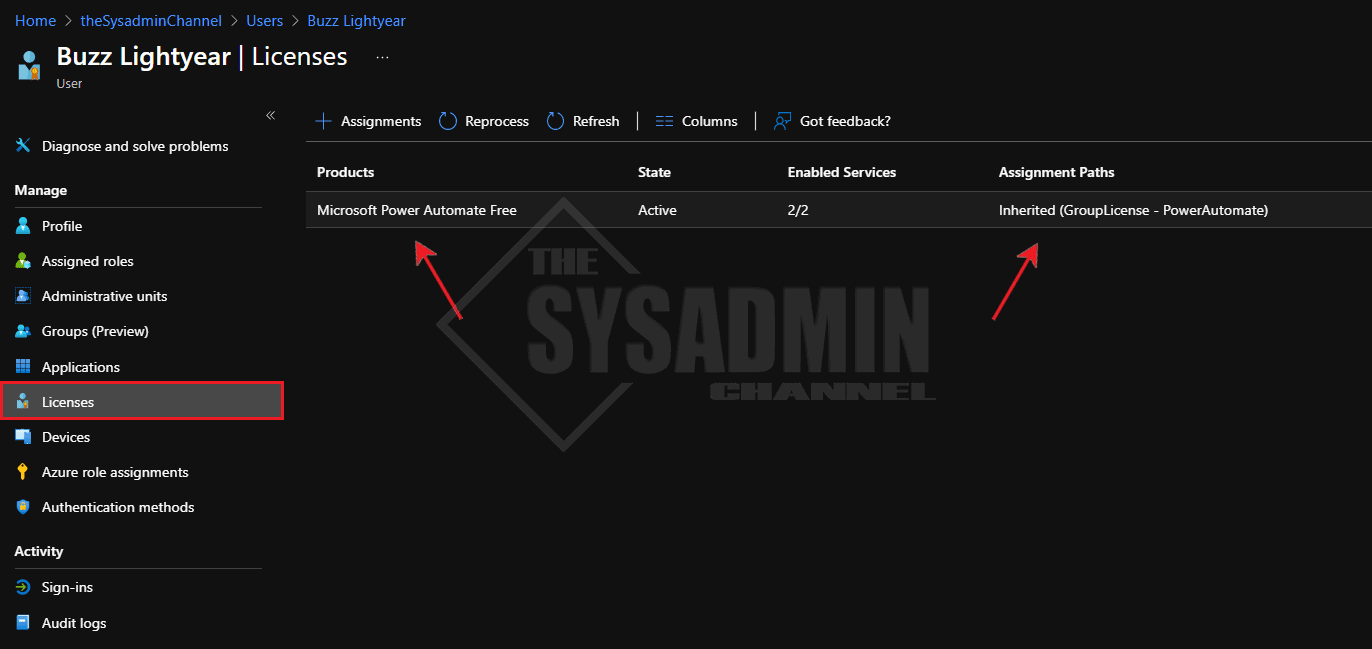
Now to confirm that the license has been applied, check on a user that is a member of a group and go to licenses. In my case, Buzz Lightyear is in the ‘GroupLicense – PowerAutomate’ Azure AD group and when I check the account, a PowerAutomate license is granted with no conflicts.
Conclusion
So hopefully you were able to get some insight on how to assign group based licensing in Azure AD. This method is really useful and in my opinion much easier to manage licenses in a larger environment. If you want to learn more about Azure AD, be sure to check out our Azure Active Directory gallery full of useful information. If video content is more your style, we also have a Youtube Channel where we post sysadmin content as well.