It’s finally here! VMware finally allows you to leverage Azure AD as a primary Identity Provider (IdP). Today we are going to cover the steps to setup VMware vCenter SSO Integration with Azure AD (Entra ID). Using Azure AD as an IdP allows you to now have vCenter in scope of conditional access policies as well as authentication methods native to Azure AD such as Windows Hello for Business or Fido2 security keys.
For the purposes of this article we will use the Azure AD Portal, not the Entra ID portal
Table Of Contents
Requirements
In order to make this work there are a few requirements/prerequisites needed so you can successfully use Azure AD as the Identity Provider. Let’s touch on those requirements now.
- VMware Administrator Role
- VMware vCenter 8.0 U2 or later
- VMware Identity Services from Azure Enterprise App Gallery
- Azure Application Administrator or Global Administrator Role
- Azure App Registration with OpenID Connect (OIDC) scope
- Publicly accessible vCenter endpoint (We will use an Azure App Proxy for this)
- A group or users to sync to vCenter
Create the Azure AD OIDC App Registration
As mentioned in the prerequisites, you will need to create an app registration in Azure AD so you can use this as the authentication endpoint. This app will need to have the openid API permission so let’s walk through setting that up now.
Within Azure AD:
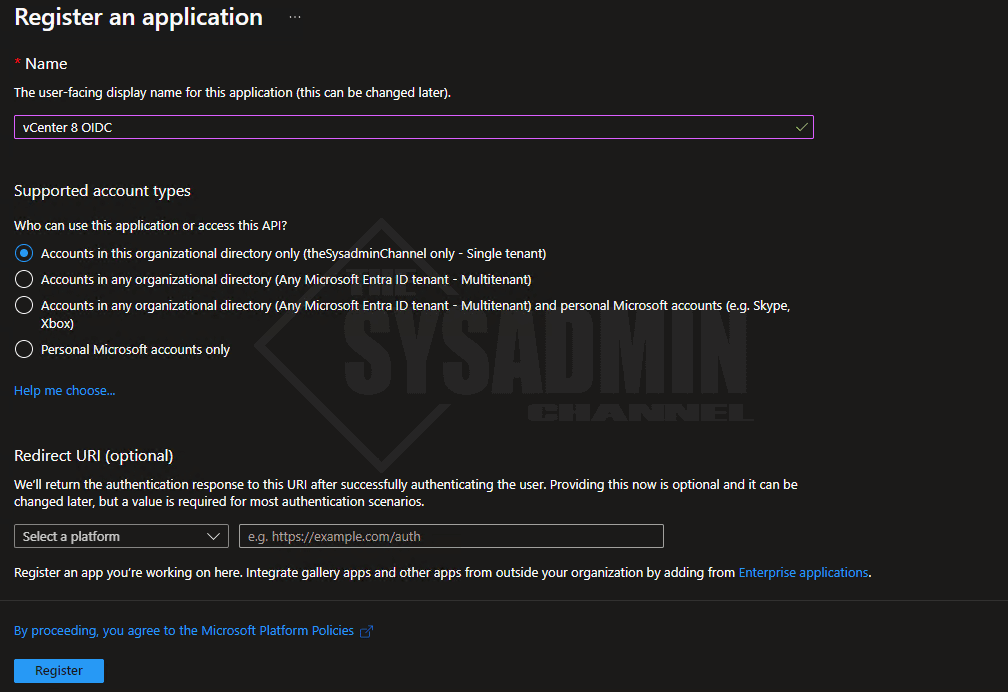
- Navigate to App Registration → New Registration
- Name the app: vCenter 8 OIDC
- Leave the Organizational directory to Single Tenant
- Leave the Redirect URI blank for now
- Click Register to create the app
Next we’ll want to add the API permissions so we can tie this Azure app to vCenter.
Within the vCenter 8 OIDC App:
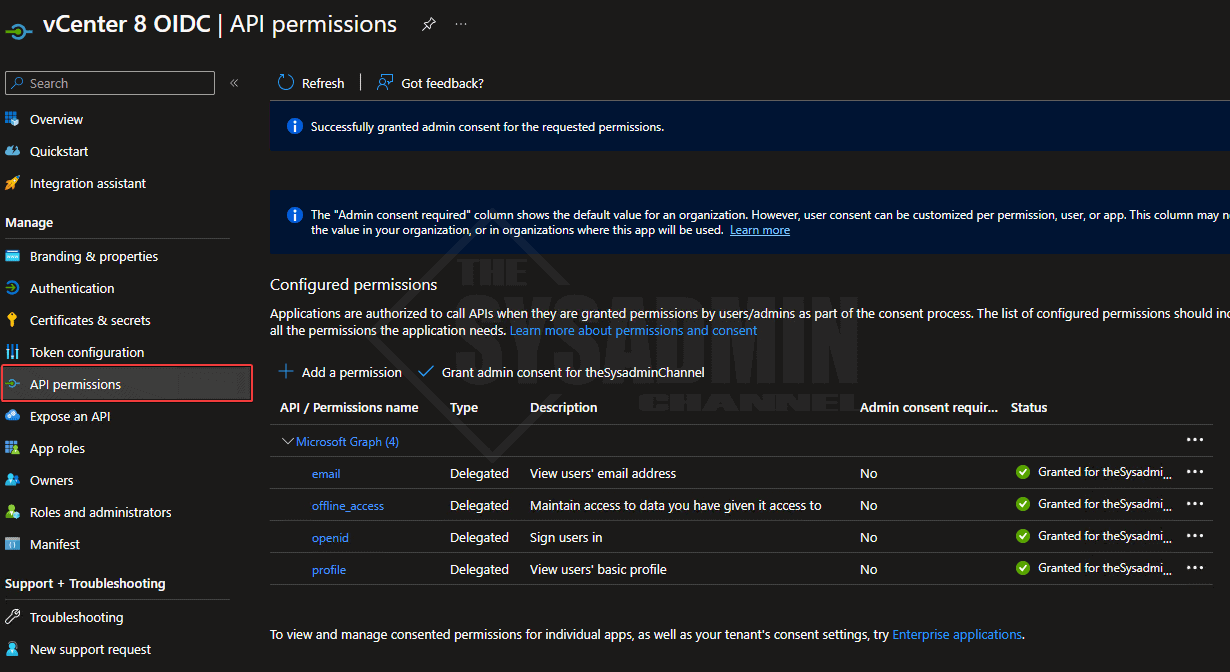
- Navigate to API Permissions
- Select Add a permission
- Choose Microsoft Graph → Delegated → enable the 4 listed below
- Grant Consent for good measure
Leave this tab open for now, we will come back to it later.
vCenter Identity Source Configuration
We’re one step closer now that we have have the OIDC app created. Next we need to configure vCenter itself so we can change the Identity Provider from the local embedded provider to Azure AD.
Within the vCenter Server:
- Login to vCenter 8 using [email protected] since we won’t have any other providers available
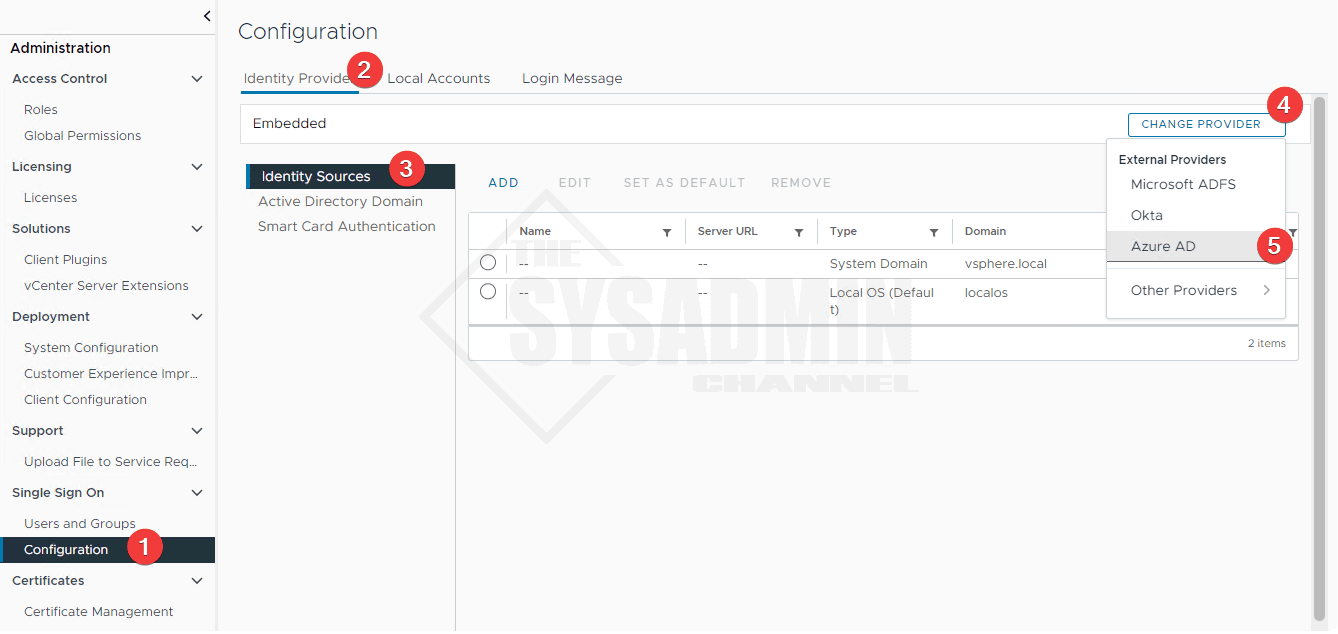
- Navigate to Administration → single sign on → configuration → Identity Provider → Identity Sources
- Click Change Provider → Azure AD
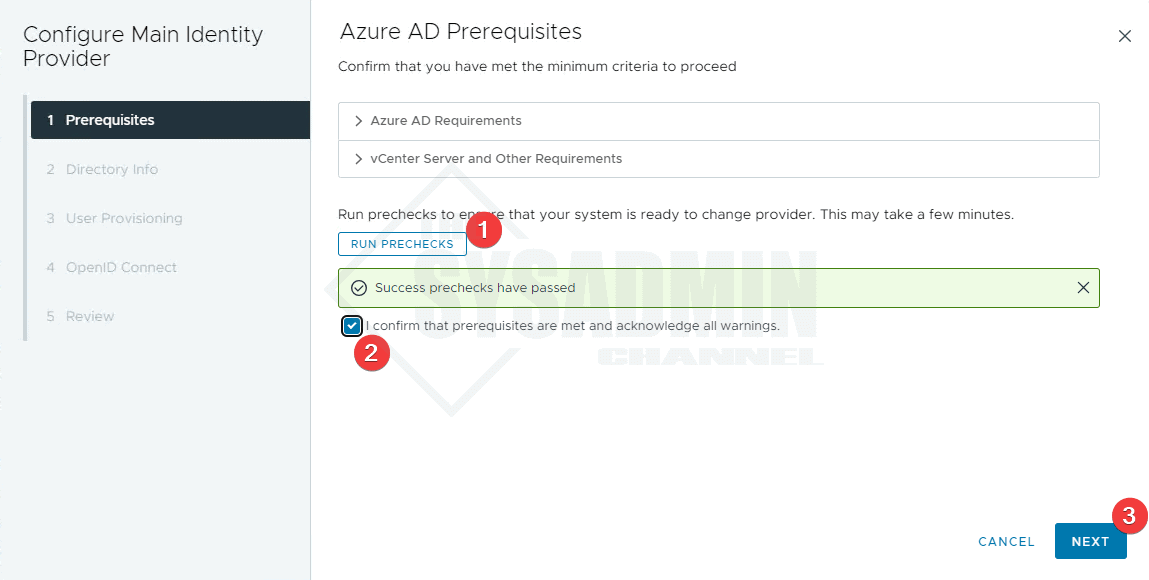
- Next, click run prechecks
- Check the box to confirm
- Click Next
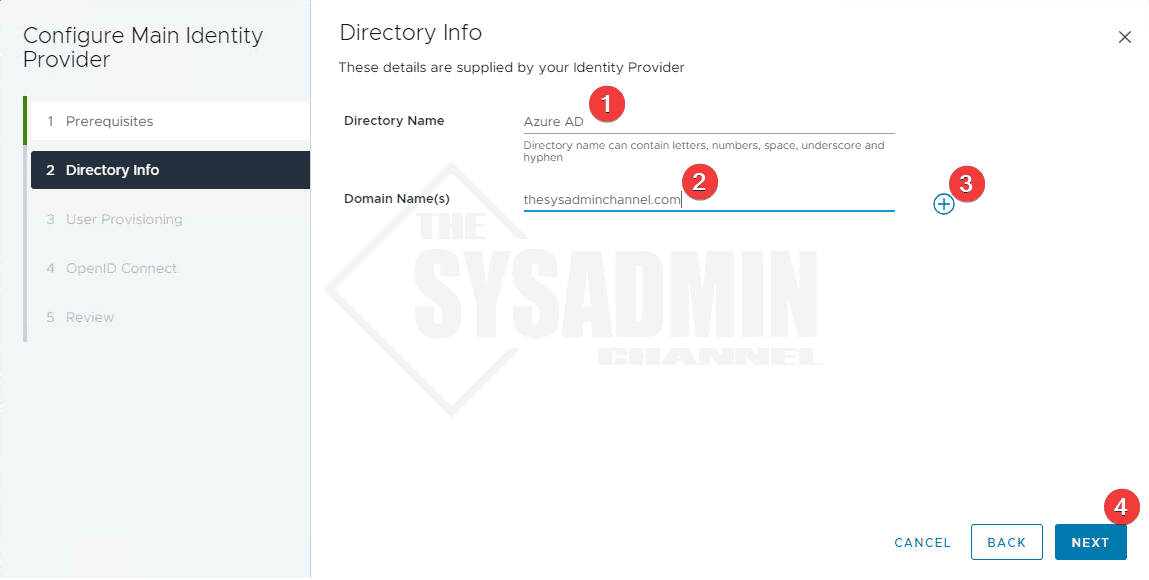
- Under Directory Name enter Azure AD
- Enter the domain(s) and click the “+” to add it
- If you have multiple UPN suffixes, add them domain names here.
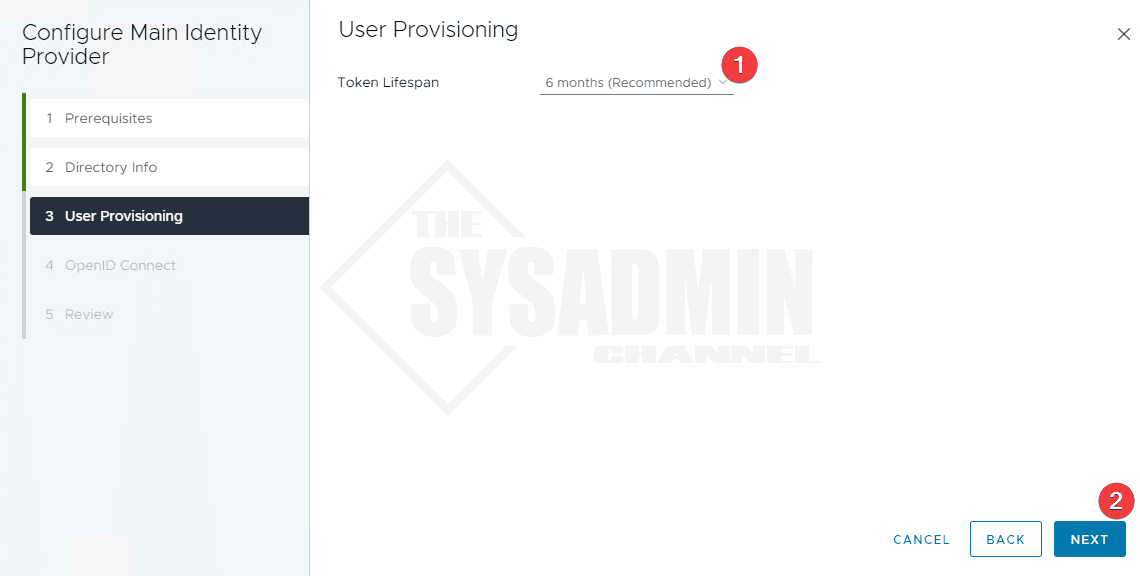
- Set the token lifetime
Earlier I mentioned to keep the tabs open because we’re going to need them later. Now is that time where we are going to use need them.
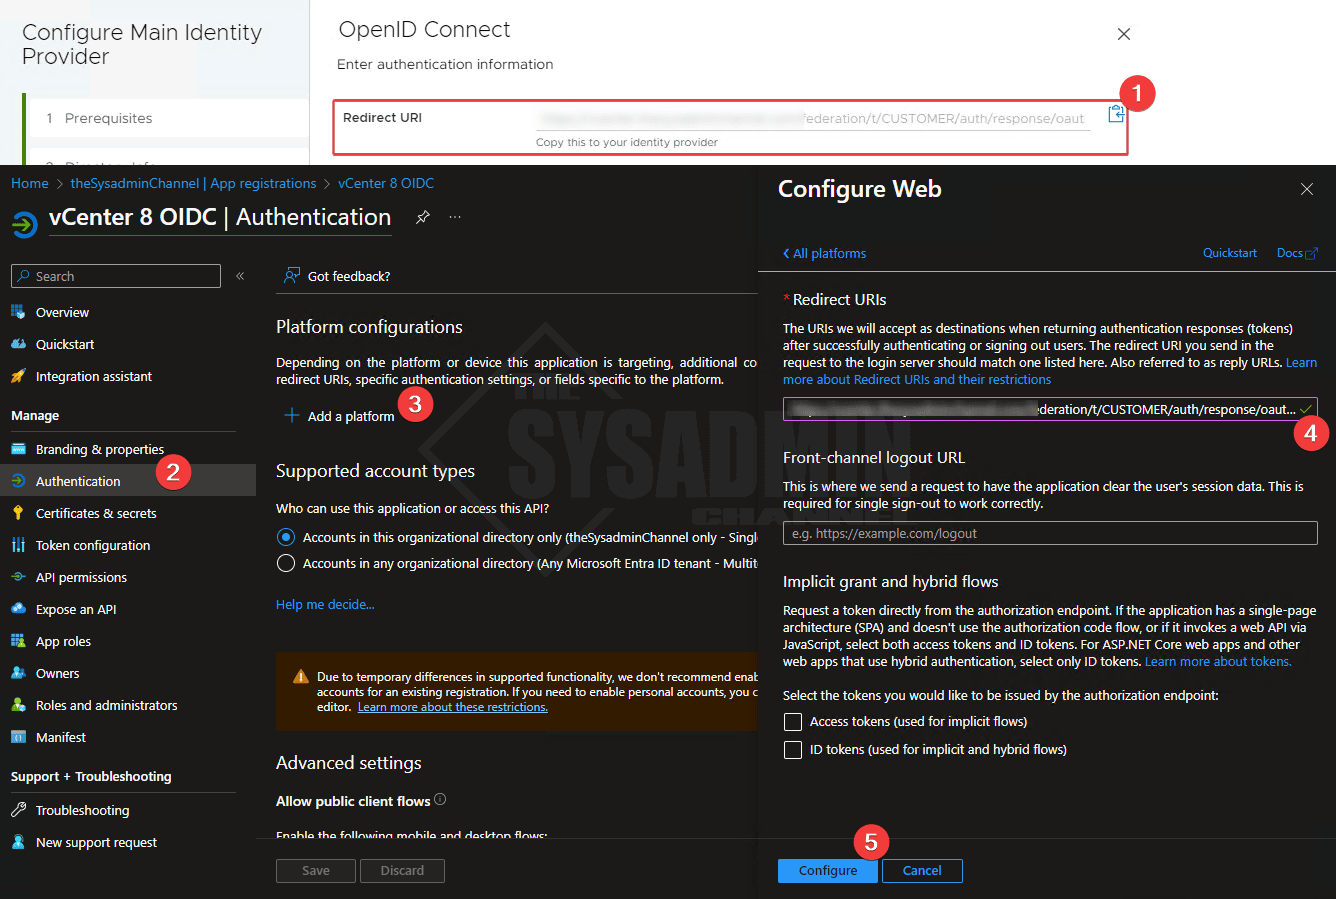
- Copy the redirect URI from the vCenter wizard
- Navigate back to the vCenter 8 OIDC app → Authentication tab
- Add a platform → Select Web
- Paste the Redirect URI into the redirect URI in the Azure app
- Click configure
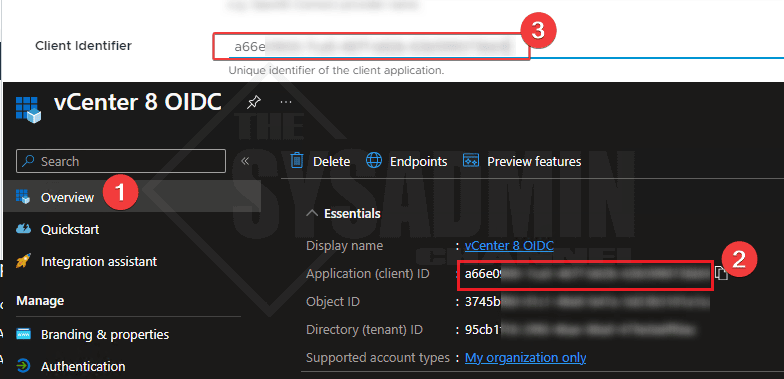
- Copy the AppId (ClientId) from the Azure OIDC app and paste it to the client identifier in vCenter
- Create a secret and paste it in vCenter
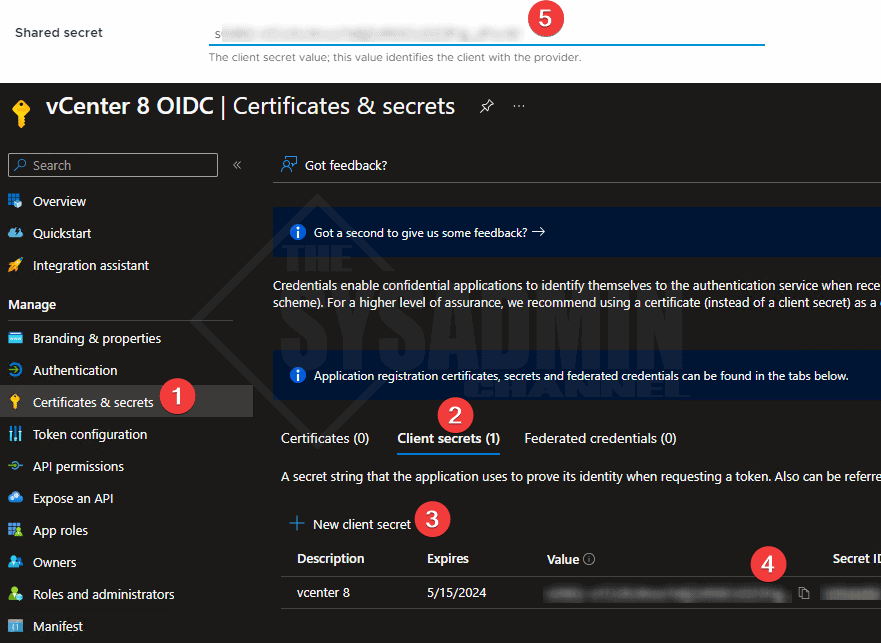
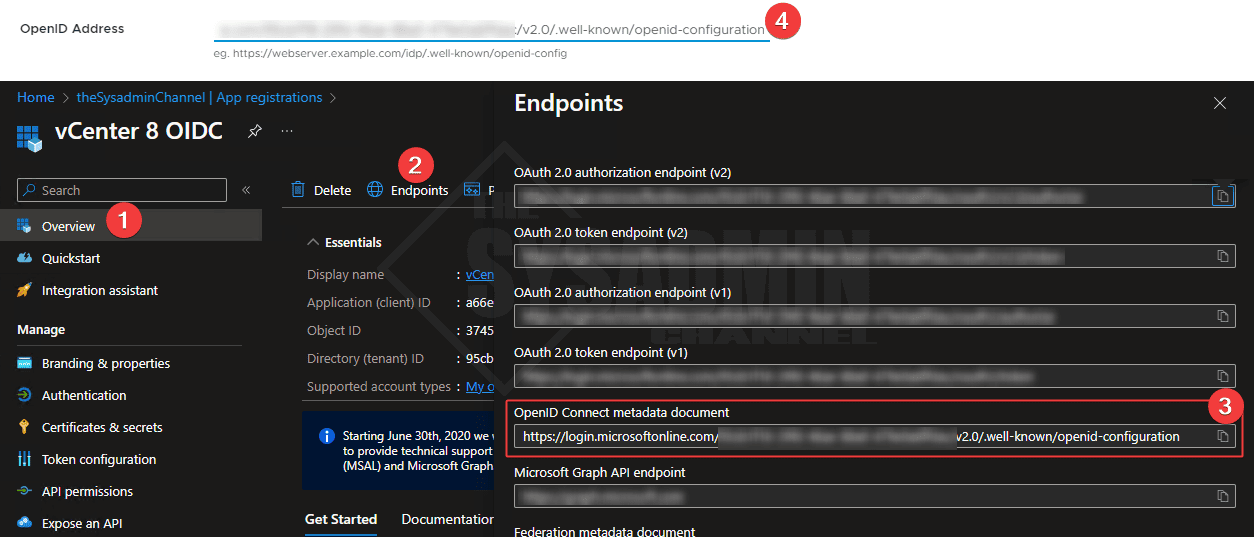
- In the overview page of the OIDC App
- Click on EndPoints
- Copy the OpenID Connect metadata document URL and paste it in vCenter
- Review the configuration and proceed
Setting up an Azure App Proxy
One of the requirements to use Azure AD as the Identity source is to make sure we are able to publicly access vCenter from Azure. I am NOT a fan of exposing your network and poking a hole in your firewall so we’ll use the next best thing. In order to satisfy this requirement, we will use an Azure app proxy which will publish an endpoint that sits behind Azure.
The idea is that we will use the app proxy’s public endpoint to route to the internal endpoint so Azure is able to talk to vCenter on-premises. An app proxy requires you to install the connector service on an on-premises server that has line of sight to your vCenter server. I would suggest you have the app proxy agent installed on 2 machines so you can have some sort of redundancy when you need to do maintenance on the servers.
Let’s walk through the setup now.
Within Azure AD, open a NEW tab:
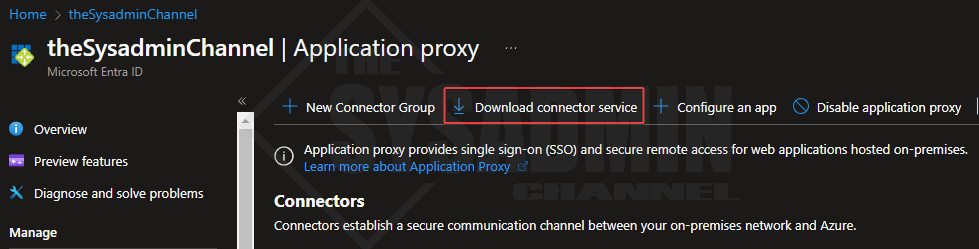
- Navigate to Azure AD → Application Proxy
- Download and install the connector service
The install is pretty straight forward so get it installed on 2 machines and go back into the Azure portal.
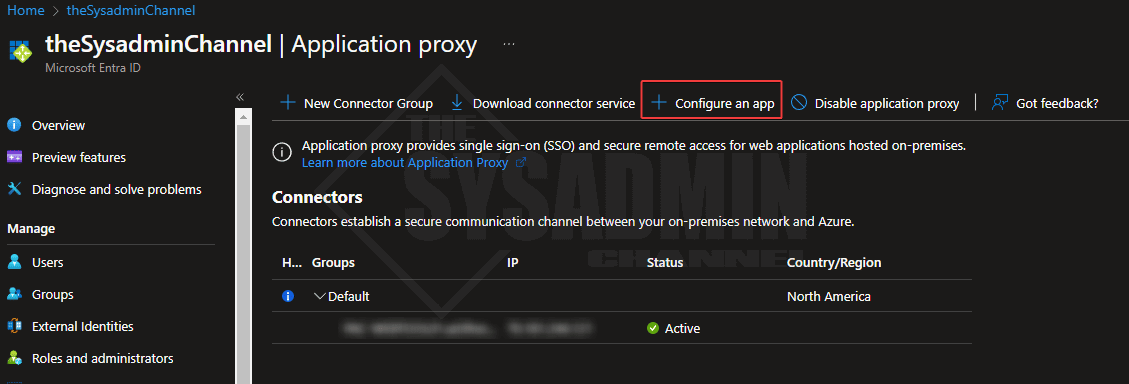
Once the connector is installed, you should see the hostname and public IP show up in the Azure proxy section. From here, click on configure an app.
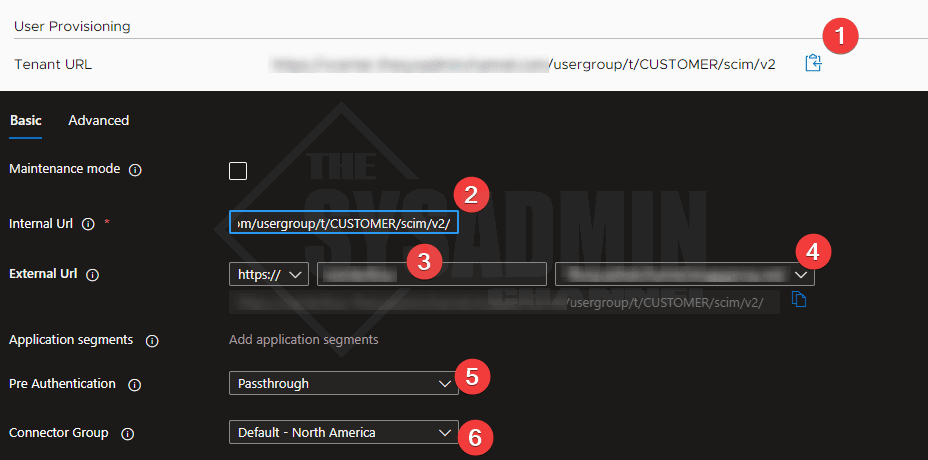
Next you should be taken to the app proxy configuration settings.
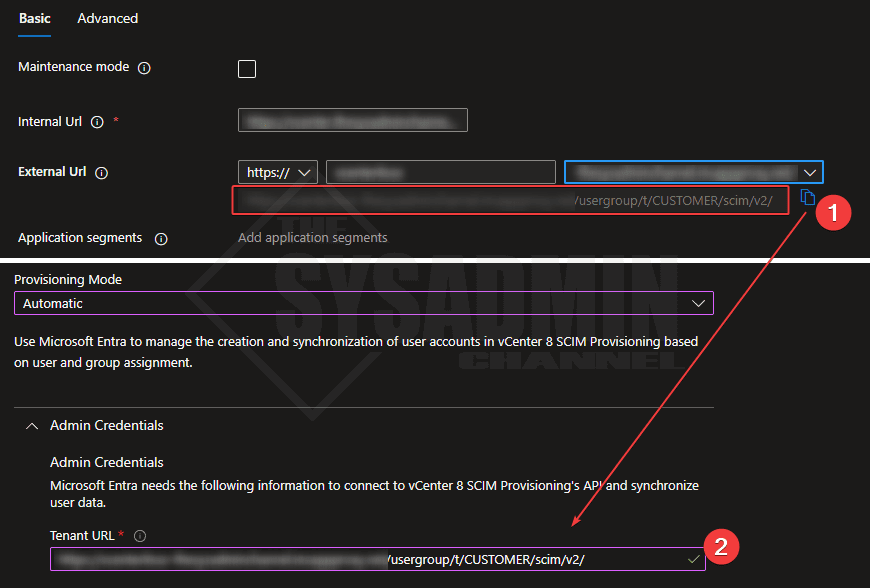
- Copy the vCenter Tenant URL and paste it into the app proxy Internal URL field
- Ensure the dropdown is set to https://
- Enter in a name for your app proxy (vcenter8appproxy or something similar is fine)
- Set the domain drop to which ever makes sense for you. Leaving the default is fine
- Set the pre authentication method to passthrough
- Set the connector group accordingly. If you have multiple connector groups, make sure it is set on the App proxy blade AND the Enterprise app settings
Trusting vCenter Root Certificate on the Connector Service Machine
If you’re using a publicly trusted certificate for vCenter than you can skip this part. However, if you’re using the default certificate that comes pre-loaded with vCenter you will need to do this. An easy way to find out, is go to your vCenter URL and if you’re getting Your connection is not private then you’re not using a trusted cert.
Let’s go back to the machine(s) that you installed the service connector on because that’s where we will need to have the cert be trusted. These steps need to be done on EACH server that has the connector agent.
On a NEW tab:
- Navigate to https://<your vcenter url>/certs/download.zip
- Right click and save as a zip file
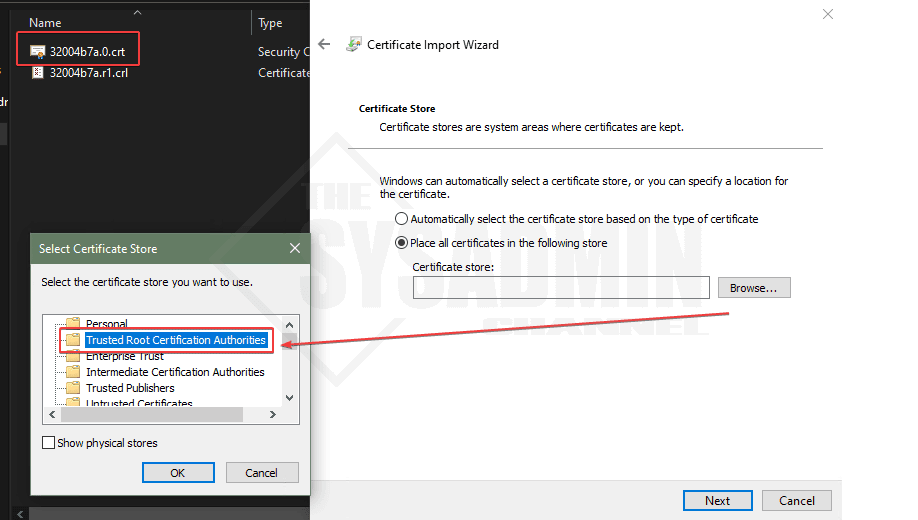
- Open the zip file → certs → win
- Double click on the crt file to install it on the local machine
- Install it under the local machine context
- Place it under the Trusted Root Certification Authorities
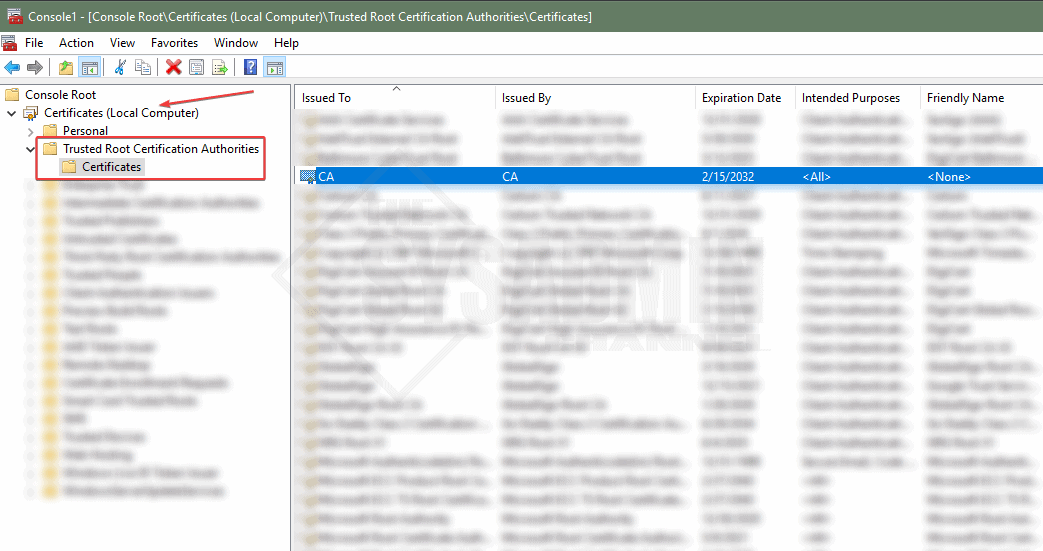
- You can verify this by opening mmc.exe on the service connector machine
- Certificates → Local machine → Trusted root certification authorities
- Seeing the CA cert there
Create the VMware Identity Service App from the Gallery
Next on the list, we’ll need to create the VMware Identity Service app from the Azure App gallery to allow us to use SCIM provisioning.
Within Azure AD on a NEW tab:
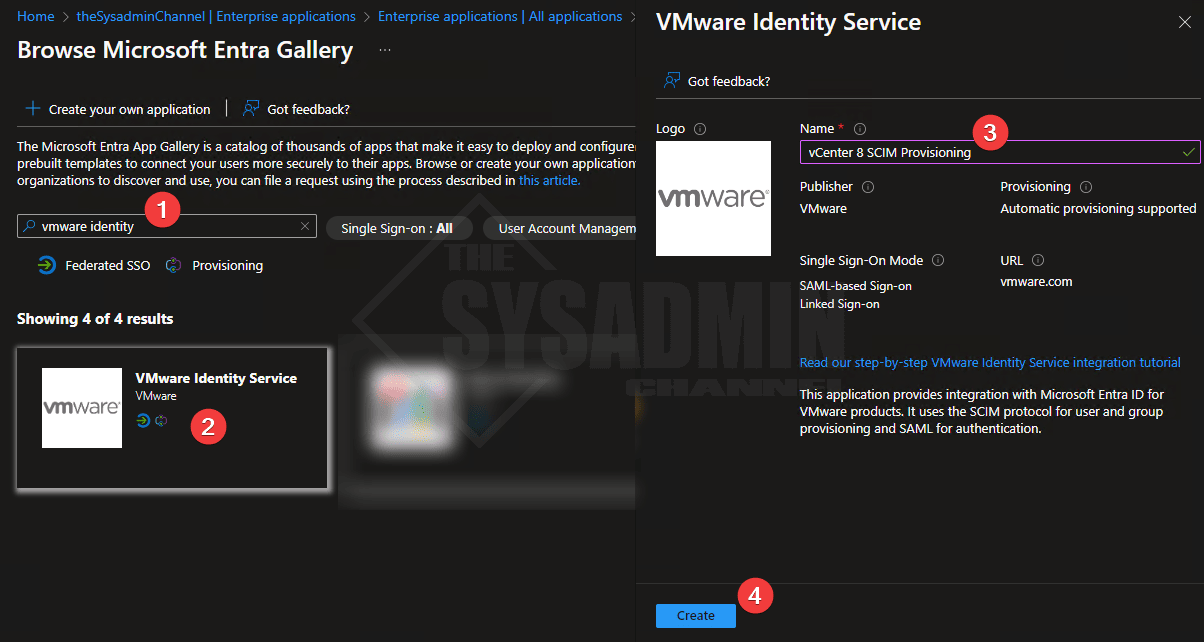
- Navigate to Enterprise Application → New Application
- Search for “VMware Identity” to install the VMware Identity Service
- Name it vCenter 8 SCIM Provisioning
Setup Provisioning to Sync Users to vCenter
Here is where the rubber meets the road and we can finally start syncing users from Azure AD to vCenter.
- Navigate to the Enterprise Application → vCenter 8 SCIM Provisioning → Provisioning
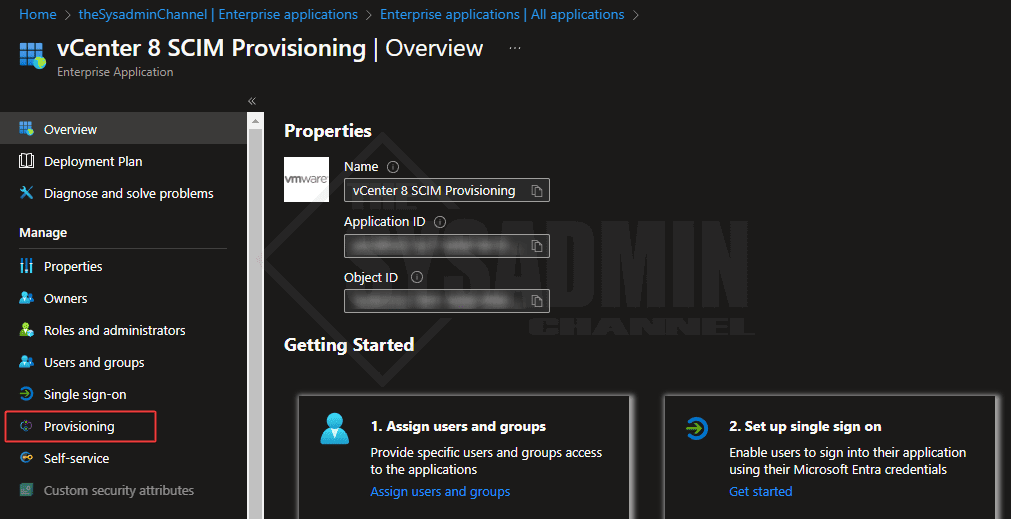
- Click on Provisioning and set the mode to automatic
- Copy the External URL from the Azure app proxy and paste it here under Tenant URL
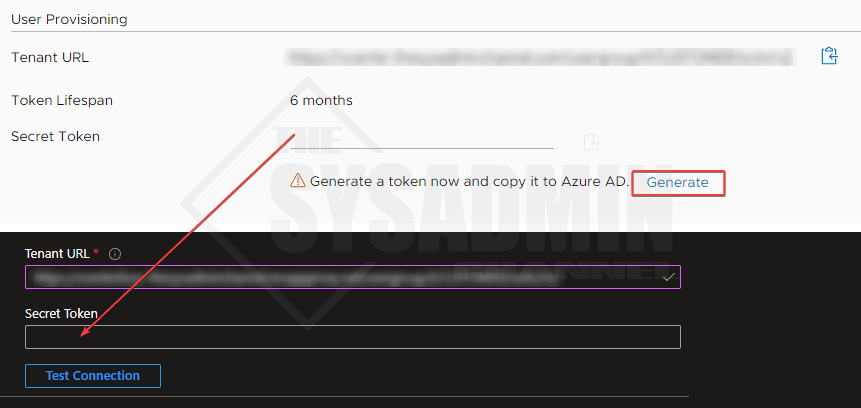
- Create a secret from vCenter 8 configuration and paste it here under Secret Token
- Click Test Connection. If everything is configured correctly, it should work.
- Save the configuration
Once the setting is saved, refresh the tab so the other settings can kick in. Another option is to close out of the blade and go back into the provisioning section.
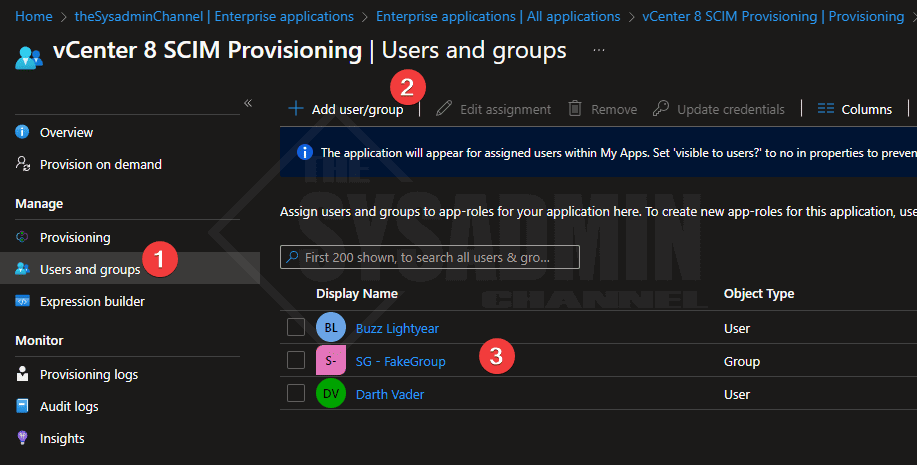
- From here within the provisioning blade → Users and groups
- Set the users and/or groups you want to sync to vCenter
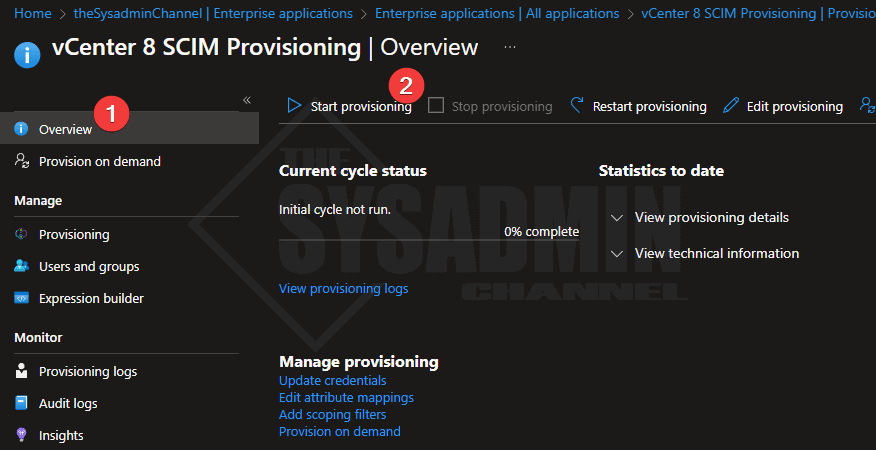
Once we’re happy with the users and/or groups we want to add, we’ll need to start the provisioning cycle so the objects can sync to vCenter 8.
- Go to the overview page
- Click on start provisioning to start the sync engine
Integrating Permissions for VMware vCenter
At this point you should now have your users and/or groups syncing to VMware vCenter 8. The last step here is to actually add these users to the permissions that you want to grant. VMware has these steps pretty well documented so it’s a quick search away. However, we’ll do a quick overview to ensure we add our users to the admin role so we can manage vCenter and all its resources.
Within vCenter 8 UI:
- Navigate to Administration → single sign on → Users and Groups → Groups → Administrators
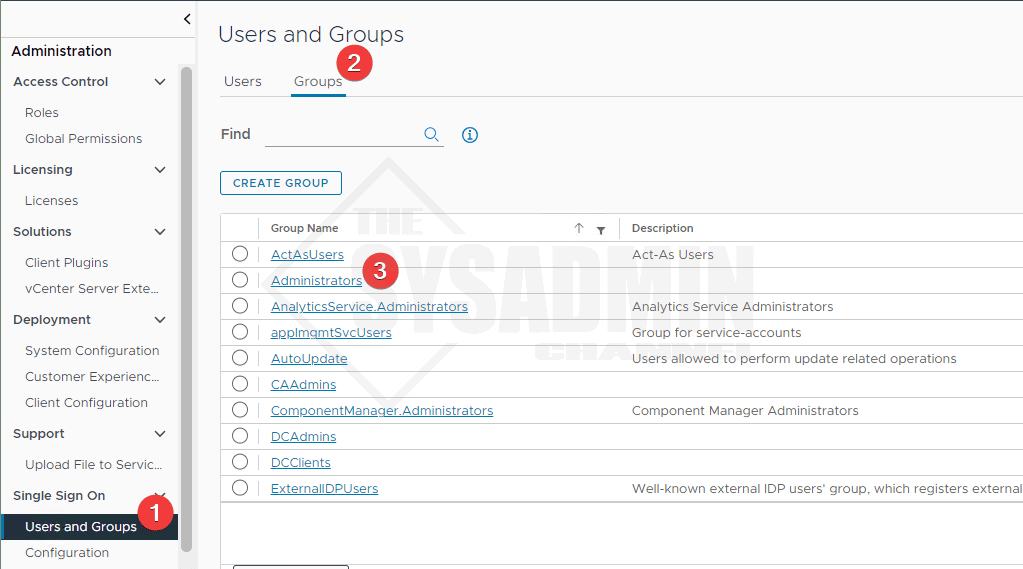
- Click Edit to modify the members
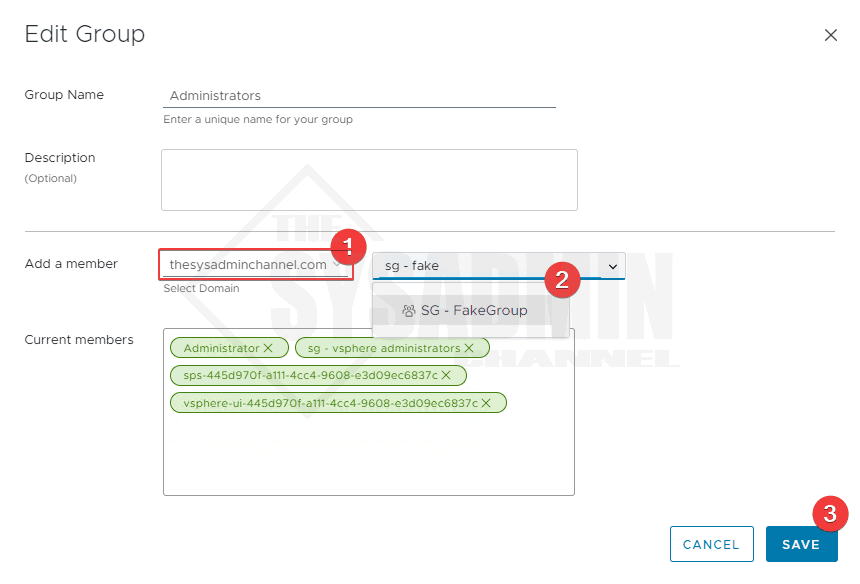
- Next to Add a member, click the drop down to add your domain
- Search for the group that is synced from Azure AD provisioning
- Click Save to save the keep the settings
Conclusion
So there you have it, a full step by step guide on how to setup VMware vCenter SSO Integration with Azure AD. This method is especially helpful because this allows you to have vCenter in scope of conditional access policies and phishing resistance MFA methods such as Windows Hello for Business and Fido 2 security keys.
cannot create azure ad indentity provider. my vCenter try to reach to the Internet: login.microsoftonline.com which is not as I want.
Hi, we have an issue with OIDC. SCIM is working fine but when trying to login from vsphere we get access denied. From logs on vcenter found that there is an issue with access to login.microsoftonline.com
We are behind the proxy and even after adding proxy settings to ws1a-broker we see that connection trying to go directly to internet
My issue is at the Provisioning Mode. When testing connection for the Admin Credentials, I get the following error:
“You appear to have entered invalid credentials. Please confirm you are using the correct information for an administrative account.
Error code: SystemForCrossDomainIdentityManagementCredentialValidationUnavailable
Details: We received this unexpected response from your application:
We received an unexpected response from the target system. Please ensure the response is SCIM-compliant and in JSON format.
Please check the service and try again. ”
Any ideas?
My issue is at the Provisioning Mode. Adding in Admin Credentials and Testing the Connection, I get:
“You appear to have entered invalid credentials. Please confirm you are using the correct information for an administrative account.
Error code: SystemForCrossDomainIdentityManagementCredentialValidationUnavailable
Details: We received this unexpected response from your application:
We received an unexpected response from the target system. Please ensure the response is SCIM-compliant and in JSON format.
Please check the service and try again. ”
Any ideas?
i got the same error did you manged to sort it?
Hi same thing, did you resolve it ?
We got the same error. What fixed it for us was at this step:
“Set the domain drop to which ever makes sense for you. Leaving the default is fine”
The default is apparently required. We changed it to something different and got the above error. However, once we switched it back to the default and saved, the connection test was successful and our SSO is working in vCenter now.
Not sure if you were able to resolve this, but there are two issues that could be related to this error. The first is that you need to make sure for the app proxy, the vCenter server CA certs are installed.
If you’ve done and confirmed this.
Make sure you’re using the actual proxy address from the application you setup. Not the Tenant ID from vCenter.
Also make sure you clear out all of the previous password.
Thank you for the great write-up. Worked like a charm for my home lab.