Windows Hello for Business is a feature in Windows OS that is secure, phishing resistant and something every organization should strive to get 100% adoption. It is the perfect combination of organizational security and user convenience. Once enabled, your users will absolutely love it. Today we’re going to go through step by step on how to enable Windows Hello for Business Cloud Trust, and deploy the configs using Group Policy (GPO) to your hybrid machines.
Table Of Contents
- What is Windows Hello for Business
- How To Enable Windows Hello for Business Cloud Trust
- Requirements
- Creating the Azure AD Kerberos Server
- Deploy Device Settings using Group Policy
- Next Generation Credential (Ngc) Client Prerequisite Check
- User Experience
- Enabling Additional Gestures like Fingerprint, Face or Fido2
- Conclusion
What is Windows Hello for Business
So what exactly is Windows Hello for Business and why should we enable it as an organization? WH4B removes the need for traditional username and passwords (in most cases) and uses device based authentication with gestures. Biometric, fingerprint, facial recognition or PIN are all examples of useable gestures that are supported with this feature.
With Windows Hello enabled, your users can seamlessly authenticate to cloud resources AND satisfy any MFA requirements since this is a strong auth credential. This credential is tied to the device and uses a gesture to verify the identity. Once the identify has been verified, it creates what is known as a Primary Refresh Token (PRT) to seamlessly sign in to cloud resources.
How To Enable Windows Hello for Business Cloud Trust
In the past, there were some hurdles trying to get WH4B enabled for hybrid environments simply because it required a Public Key Infrastructure (PKI) to initially get the ball rolling.
Many organizations don’t have this setup in their environment so Microsoft released the latest evolution for this feature which is called Cloud Trust. Cloud Trust doesn’t require a PKI infrastructure and it doesn’t need any certificates deployed to machines or domain controllers. What does it need? Let’s touch on that right now.
Requirements
There are requirements for the infrastructure as well as the client. Both sets of requirements must be fulfilled to ensure this is working successfully.
Infrastructure Requirements:
- AzureADHybridAuthenticationManagement PowerShell Module
- Several fully patched Windows Server 2016 or later Domain Controllers
- A Domain Admin to create the Azure AD Kerberos Server object
- A Global Admin to authenticate to the Azure tenant
Client Requirements:
- Fully patched Windows 10 21H2 or later devices
- Devices are Hybrid Azure AD Joined
- Managed via Group Policy or Microsoft Intune (this article focuses on deploying via GPO)
- The user must be enrolled in MFA
Creating the Azure AD Kerberos Server
As part of the infrastructure requirements, we’ll need to install/use the AzureADHybridAuthenticationManagement PowerShell module. This module has the specific cmdlets needed to create the Azure AD Kerberos server for your on-premises domain.
#Install Powershell module
Install-Module -Name AzureADHybridAuthenticationManagement -AllowClobber -Scope AllUsers
With the PowerShell module installed, we can now create the AAD Kerberos server using domain admin and global admin credentials. The domain admin credentials are needed to create the on-premises AD object and the global administrator is needed to confirm that you have proper access to the tenant.
$Domain = 'ad.thesysadminchannel.com'
$DomainCredential = Get-Credential -UserName 'ad\domainadmin' -Message 'Enter Password'

Set-AzureADKerberosServer -Domain $Domain -DomainCredential $DomainCredential `
  -UserPrincipalName [email protected]

Get-AzureADKerberosServer -Domain $Domain -DomainCredential $DomainCredential `
  -UserPrincipalName [email protected]

You will notice that a new computer object will be created in the Domain Controllers OU within AD.

Deploy Device Settings using Group Policy
With the Azure AD Kerberos server already created, all that’s left from an infrastructure perspective is to deploy the policy settings to the client devices. As I mentioned previously, this can be completed via Microsoft Intune, however this article is going to focus on deploying those configs via Group Policy.
With Group Policy Editor Open:
- Navigate to Computer Configuration → Administrative Templates → Windows Components → Windows Hello for Business
- set Use a hardware security device to Enabled
- set Use biometrics to Enabled
- set Use Windows Hello for Business to Enabled
- set Use cloud trust for on-premises authentication to Enabled
- Apply the policy to your computer objects
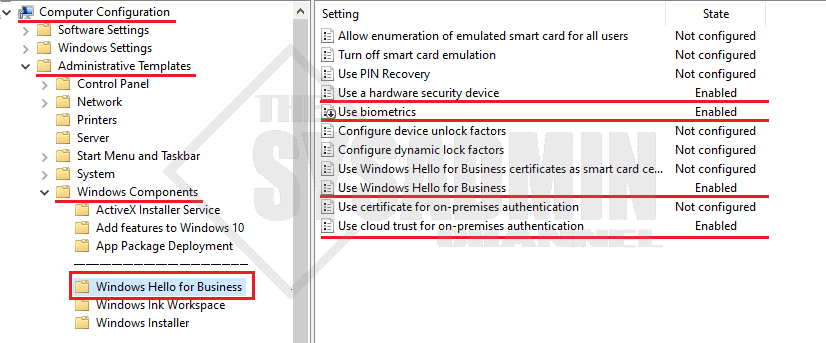
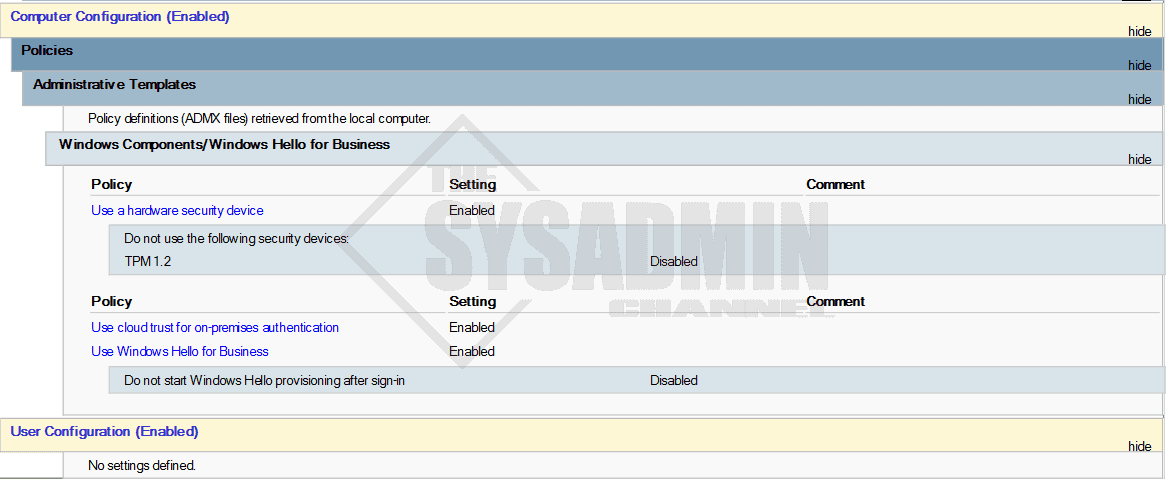
The policy should look like this in the settings page.
Next Generation Credential (Ngc) Client Prerequisite Check
Let’s head on over to the client machine to see what the current status of the device is and check if it will provision or not. This is not something the end user will be doing, however, it will provide troubleshooting tips if something is not working.
While on the client machine, open PowerShell and type: dsregcmd /status. Take a look at the device state and more importantly the Ngc Prerequisite Check (Image is edited for readability so you’ll need to scroll all the way down to see it).
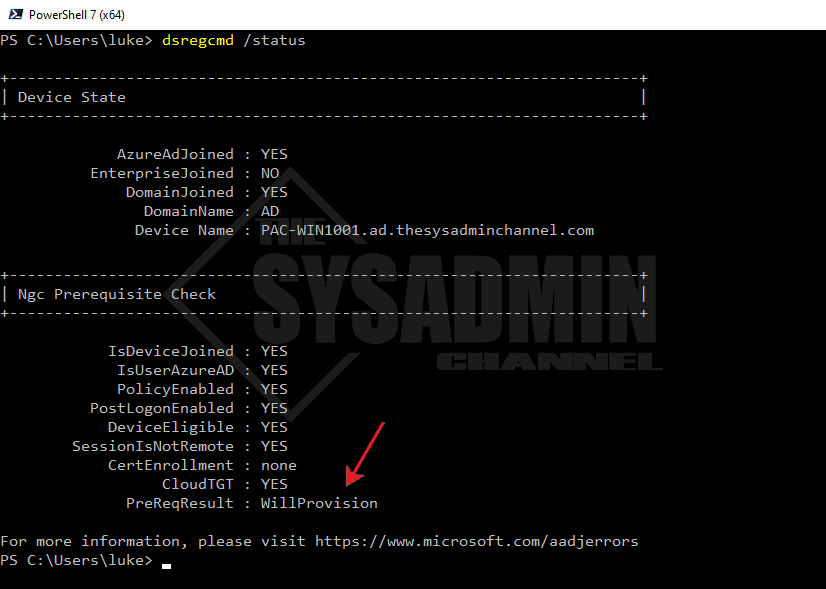
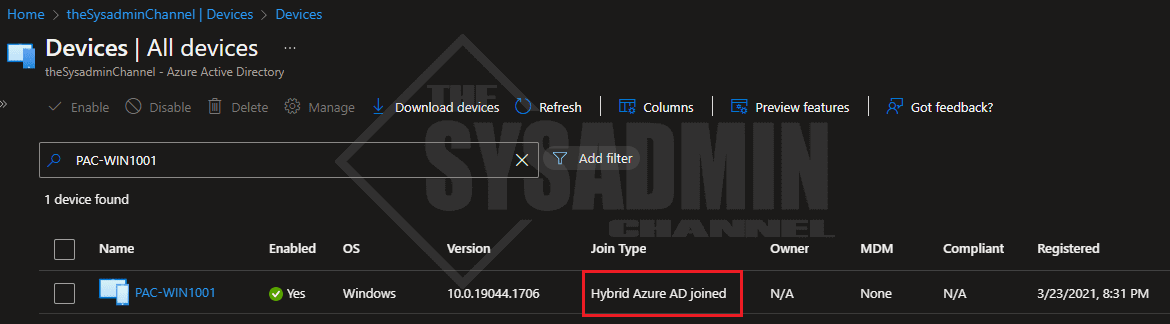
This will give you details for the provisioning state of the device. If there are any issues like the device is not joined, the CloudTGT is unknown or the device is not eligible, a good place to start troubleshooting is to make sure the device is successfully Hybrid Azure AD Joined (not Azure AD Registered)
User Experience
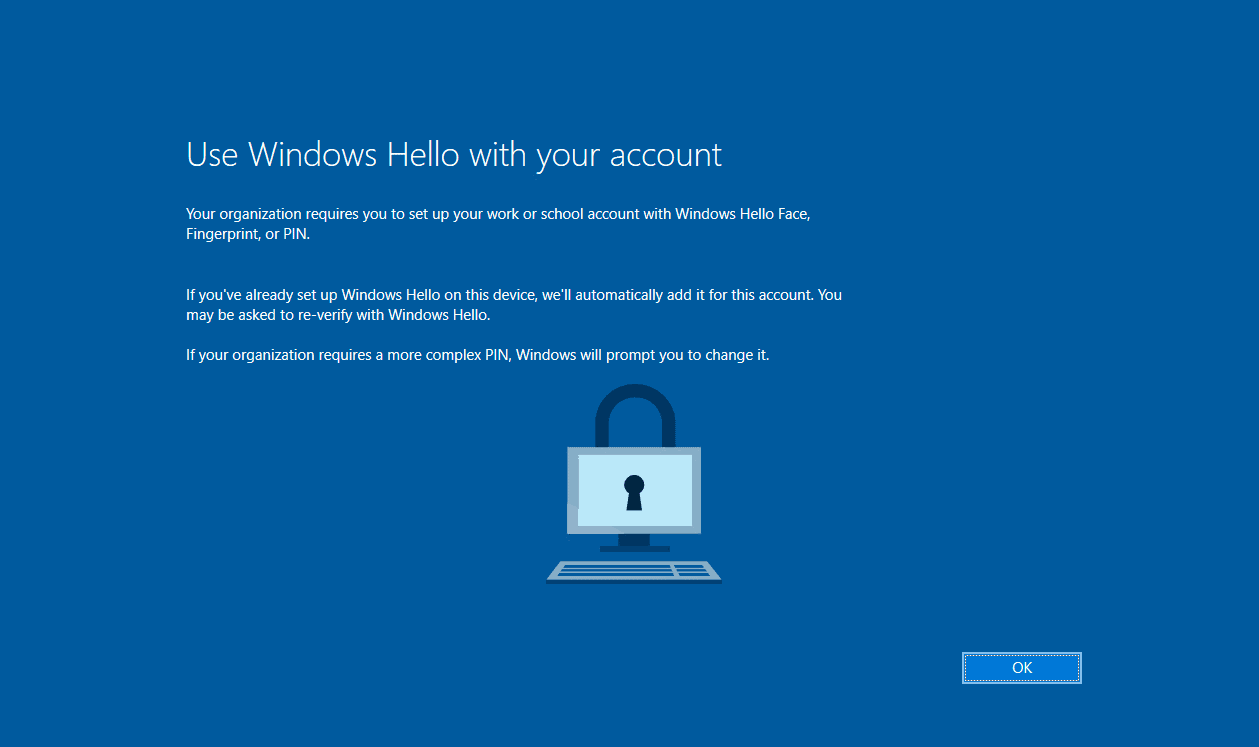
We’ve now confirmed that the device is eligible and our status check says that it will provision. What now?
The next time the user logs in they should be prompted with the Windows Hello enrollment screen. If it’s not popping up, I’ve noticed logging out and logging back in again (instead of rebooting) usually does the trick.
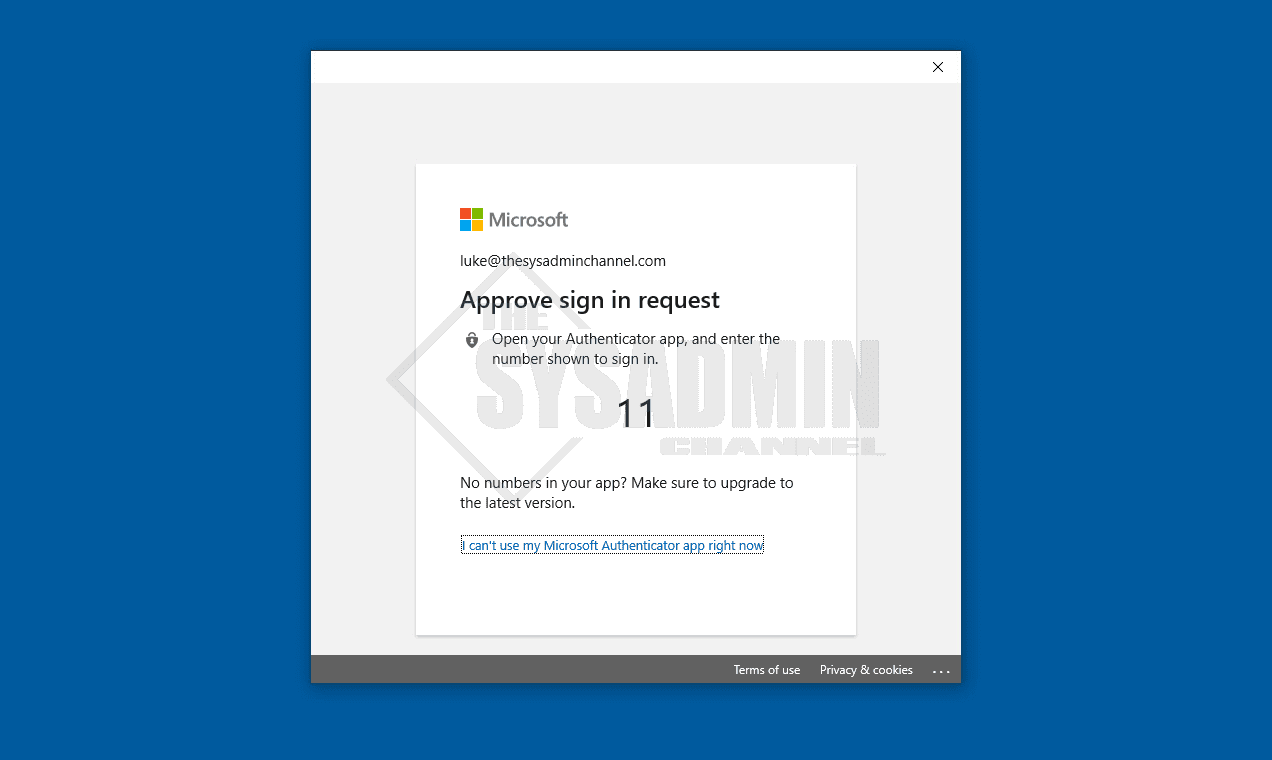
The user will need to confirm their identity for completing an MFA request. If the user is not enrolled in MFA, they’ll most likely be prompted here to enroll. However, in our case, we have MFA enrolled so we’ll just complete the MFA number matching request.
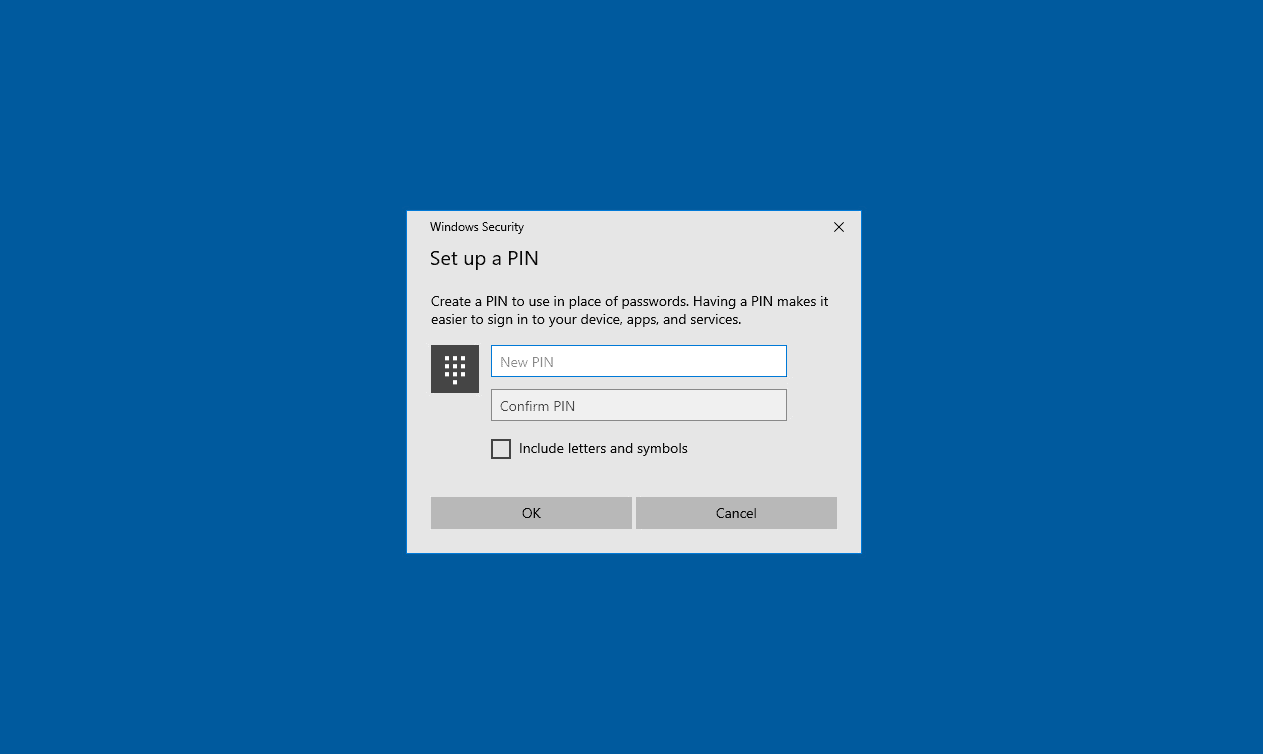
Next we’ll be prompted to set up a PIN that can be used only for this device.
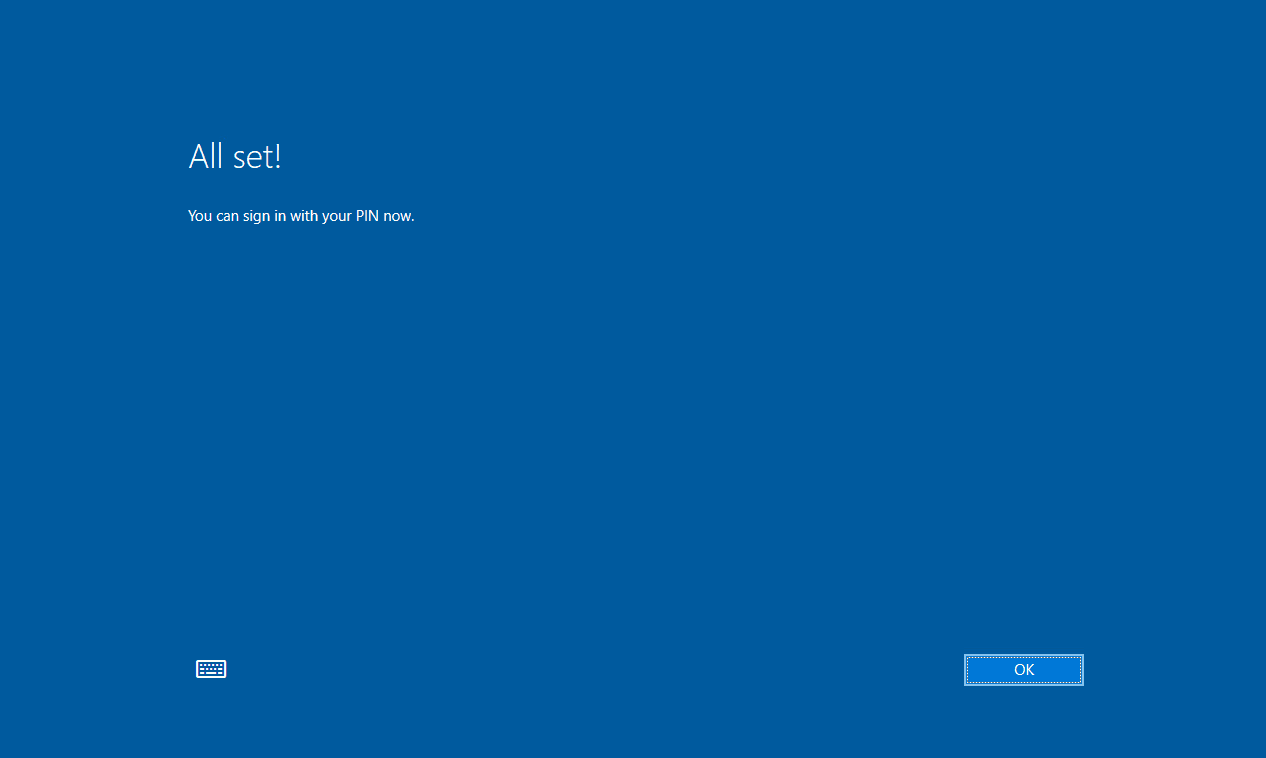
If there are no issues, you should now see an All set! screen.
Enabling Additional Gestures like Fingerprint, Face or Fido2
In the event you want to enable additional gestures like Fingerprint, Face or even a Fido2 security key you can do this manually without having to go through the wizard.
For example, I personally like using external USB keys like the TrustKey G320H because it supports Windows Hello Fingerprint and Fido2. Since I usually have my device with the lid closed and stowed away, this works great and it’s something I use literally everyday. If I get another key, I can enable it using these settings.
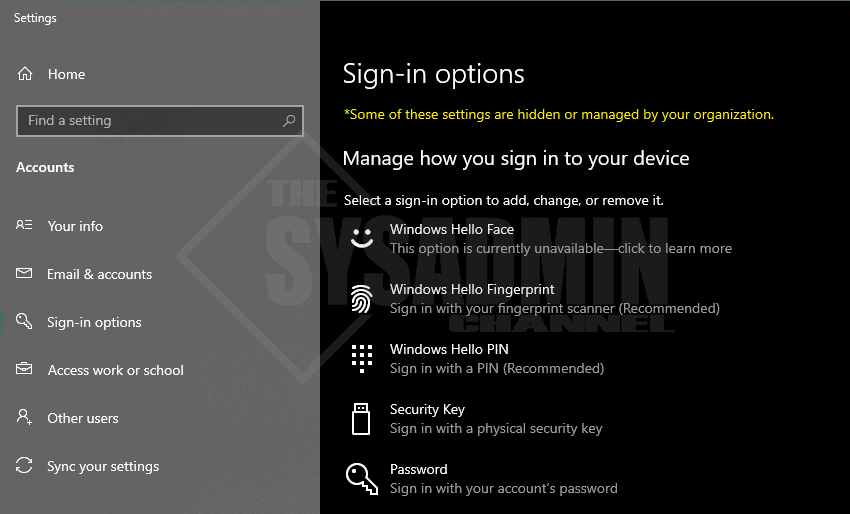
To enable additional gestures go to start → type: Sign-in options
Conclusion
Hopefully this article provided in-depth knowledge on how to enable Windows Hello for Business Cloud Trust. This implementation is honestly quite easy and doesn’t take a lot of effort to get the ball rolling. You will just need to make sure you test with a pilot group and communicate to your users what they’ll expect to see when this rolls out.
Question: in the powershell commands, I’m confused about what domain to put. We are hybrid with a .local domain, a domain.onmicrosoft.com and a routable domain of mydomain.com. Our users authenticate with [email protected], but using that domain is failing. Do I use my onmicrosoft domain?