It’s not DNS! It can’t be DNS!! No way in hell it’s DNS!!! It’s definitely DNS. If you’ve been around the block a couple of times I’m almost certain Domain Naming System got the best of you at least once or twice. Troubleshooting the issue to no end only to find out it was DNS all along. Bastard!! Well, no need to worry because it happens to the best of us. In this article i’ll give you the quick and dirty on How To Setup and Configure DNS Reverse Lookup Zones for your domain so you can make troubleshooting work a little more in your favor.
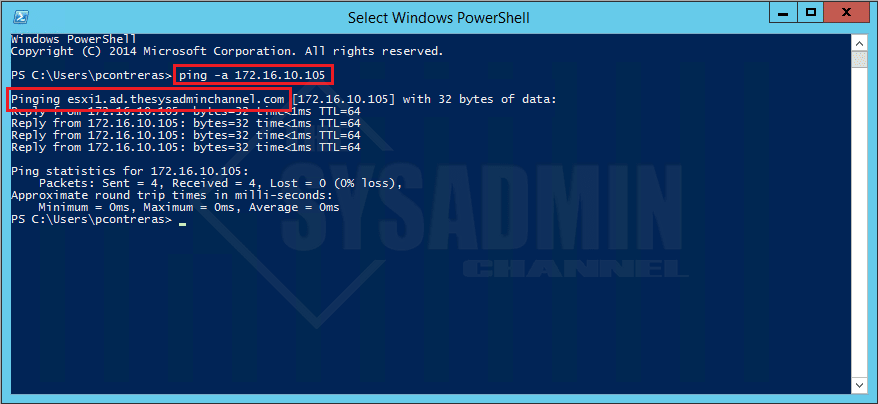
Reverse lookup is not enabled by default so this means that anytime you try and do a ping -a in your command prompt, it will not give you the corresponding host name. This makes troubleshooting that much harder and when it comes to DNS, you need all the help you can get.
Setup and Configure DNS Reverse Lookup Zones
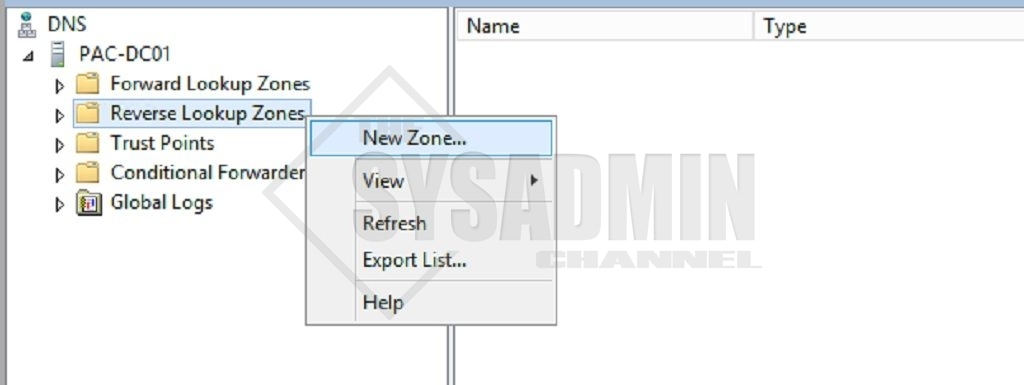
- On your Domain Controller, open up DNS Manager
- Right click Reverse Lookup Zones and click New Zone
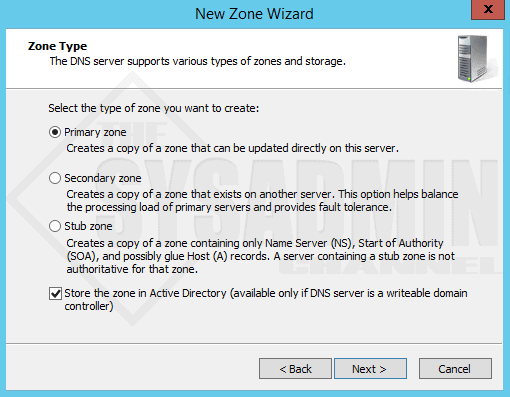
- Select the appropriate zone for your scenario.
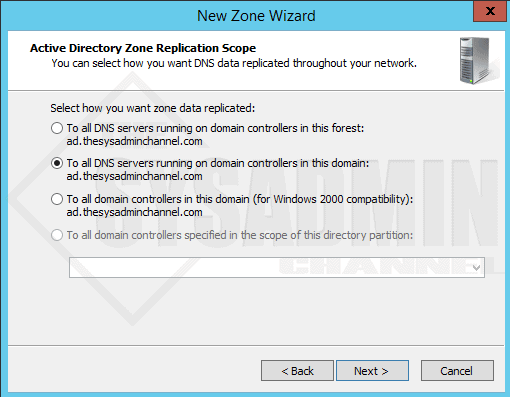
- Select the appropriate zone scope for your scenario.
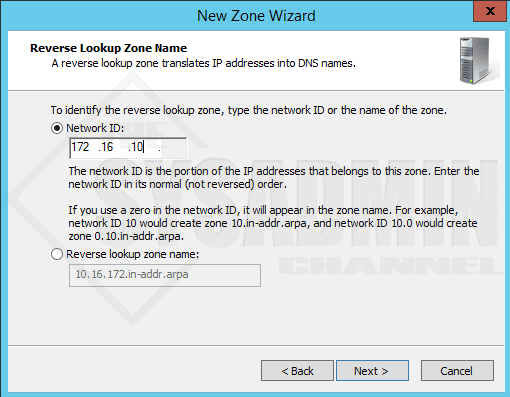
- Enter in the Network ID, for instance if your network is 192.168.1.0 with a subnet mask of 255.255.255.0. You will use 192.168.1 your network ID.
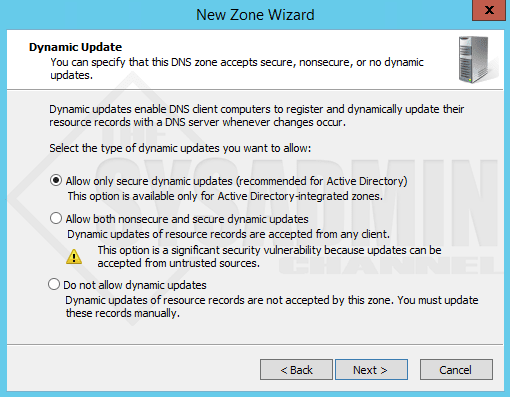
- Since we’re using Active Directory, I’ll leave this as the default.
- Going forward you should now be able to ping an IP on that network and have it resolve to a hostname.
Watch as I show you how to setup and configure DNS reverse lookup zones
And you there have it guys!! I hope this video and article enables you to be a better sysadmin. Just remember… It’s always DNS.

