With the newer release of the Powershell Module for Exchange Online I wanted to take the time to show you folks how to get that installed on your system. Microsoft claims that it is more reliable and faster than its predecessor so I wanted to drop a quick post to show you how to install Exchange Online Powershell module.
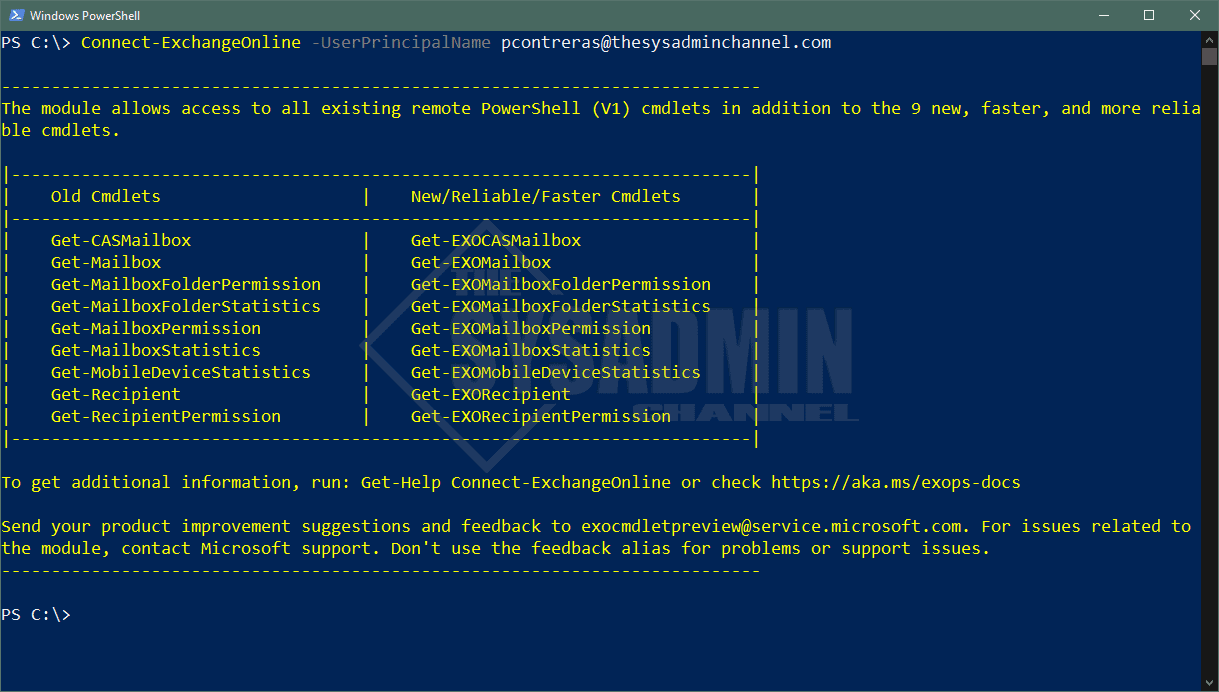
Some new cmdlets are now prefixed with Get-EXO…
The benefit to having this module as opposed to the version 1 module we previously got from the Exchange Admin Center in portal.office.com is that we can install this across everyone’s profile. The previous module (using Connect-EXOPSSession) was profile based so if Melissa installed it on her profile, it wouldn’t carry over to mine and I would have to go through the process myself. This particularly made it difficult for admins using a shared jumpbox because every new user would need to go through the motions if they wanted the connection. Pretty lame!
Furthermore, just like its predecessor it also supports MFA so you can ensure your security remains intact.
Install Exchange Online Powershell Module From PC With Internet Connection
- From a computer with an internet connection open PowerShell (preferably as an administrator)
- Find-Module -Name ExchangeOnlineManagement
- Install-Module -Name ExchangeOnlineManagement -Scope AllUsers
- Get-Command -Module ExchangeOnlineManagement

Using the -Scope CurrentUser parameter allows Powershell to install the module without administrator access.
Offline Installation of Exchange Online Management Module
If you’re on a machine that for some reason can’t connect to the internet, or the PSRepository is blocked, that’s ok because we’ll go over the steps to install the module without internet access.
- Hop on a computer with internet access and open PowerShell (preferably as an administrator)
- Find-Module -Name ExchangeOnlineManagement
- Save-Module -Name ExchangeOnlineManagement -Path Path
- Copy the files you downloaded to the offline computer
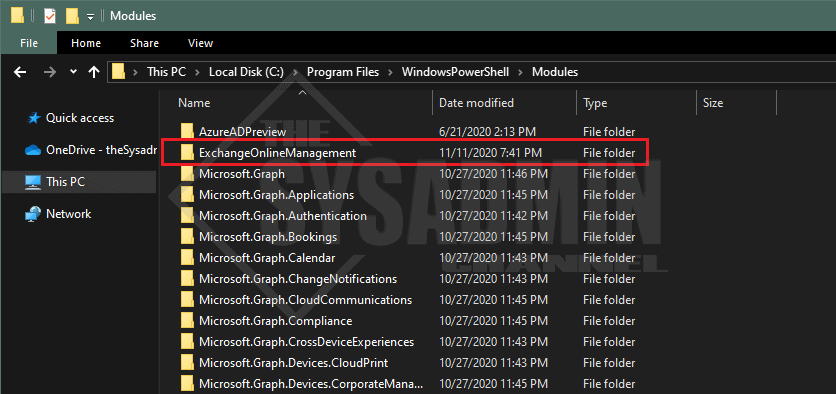
- Move the copied files to C:\Program Files\WindowsPowerShell\Modules (requires admin rights)
At this point you have the module installed and now it’s a matter connecting to the Exchange Online service.
Connect-ExchangeOnline -UserPrincipalName [email protected]
Get-Mailbox username
As mentioned this was going to be a really quick note to show you how to Install Exchange Online Powershell Module so hopefully this articles explains that. If you’re looking what to do with the Powershell or Exchange Online, be sure to check out our own Powershell gallery full of useful real world scripts, tips and tricks. If that’s not something you’re in the mood for, check out the other Exchange Online articles or even our Youtube Channel for more fun in the sysadmin sun.
Thank you so much for this article – I’ve been pulling my hair out dealing with Microsoft’s horrible KB setup.
The term ‘Find-Module’ is not recognized as the name of a cmdlet, function, script file, or operable program.
Excellent post. Am now able to connect. to exchange.
Mant thanks.
THANK YOU Very much!
Iwas havig a head ache because I was not abel to connect!!!