Wow! I must say this is a preview that I’ve been waiting to go public for quite some time. Microsoft recently released a feature to show the application as well as the IP address location in your MFA push notifications. This feature is more appropriately referred to as MFA additional context and it’s definitely a step in right direction for security and IT Professionals. This article will explain how to enable location rich context for MFA push notifications.
Table Of Contents
What is Additional Context
As mentioned, additional context allows the user to see what application triggered the MFA challenge and arguably more importantly, the location of the device that triggered it. So essentially, it will tell you what and where the MFA was triggered.
A lot of administrators have been requesting a feature like this to provide better security for their organization. Now, when users get MFA push notifications they can confirm that the location is not somewhere half way across the world.
What Are The Requirements To Enable This Feature
Before we get into the steps to enable this feature, let’s take a brief moment to discuss the requirements.
For starters:
- A Global Administrator -or Authentication Policy Administrator are required to set the policies
- MFA push notifications must be enabled and set as the default
- Note: If the default authentication method is TOTP additional context won’t work
How To Enable Location Rich Context For MFA Push Notifications
In order to move forward with MFA location rich context, let’s take you step by step to enable this policy for all or a subset of users in your organization. This can be enabled via Graph Explorer, but we’ll cover the method for setting this up in the Azure Portal graphical user interface.
In the Azure Portal:
- Navigate to Azure AD -> Security -> Authentication Methods
- Select Microsoft Authenticator
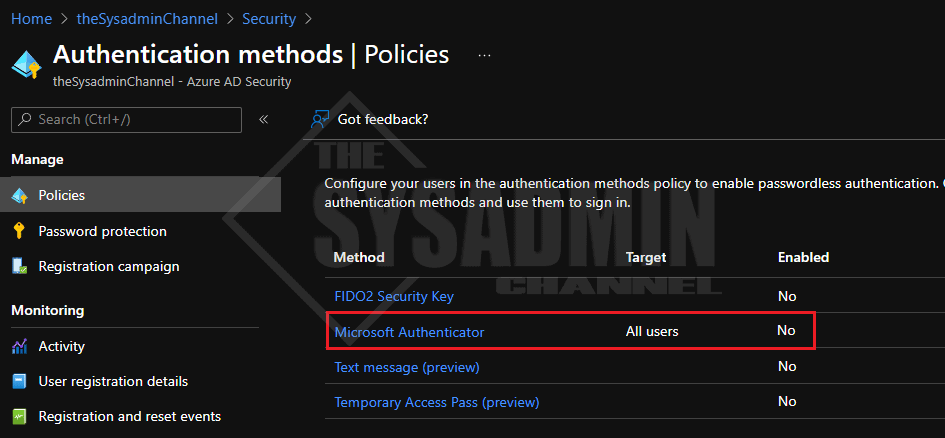
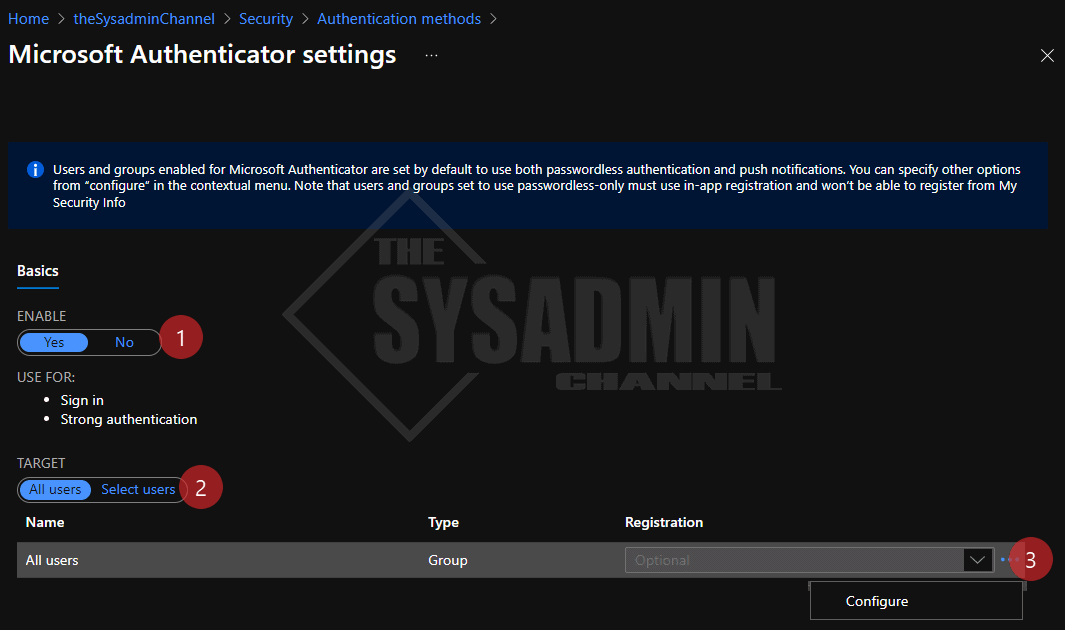
- Under Enable: Click Yes to enable the policy
- Under Target: Select your choice of All users -or Select users
- Next to Registration, click the 3 ellipsis -> Configure
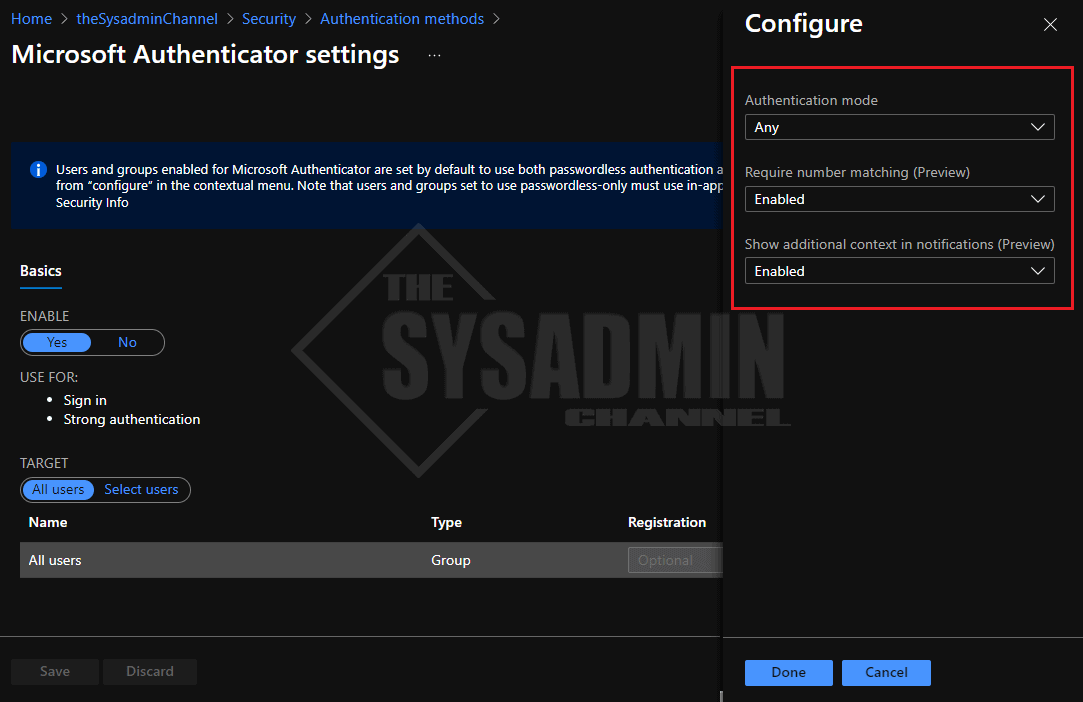
- Authentication Method: set to Any
- Require Number Matching: I recommend setting to enable
- Show additional context in notifications: set to Enabled
- Click Done
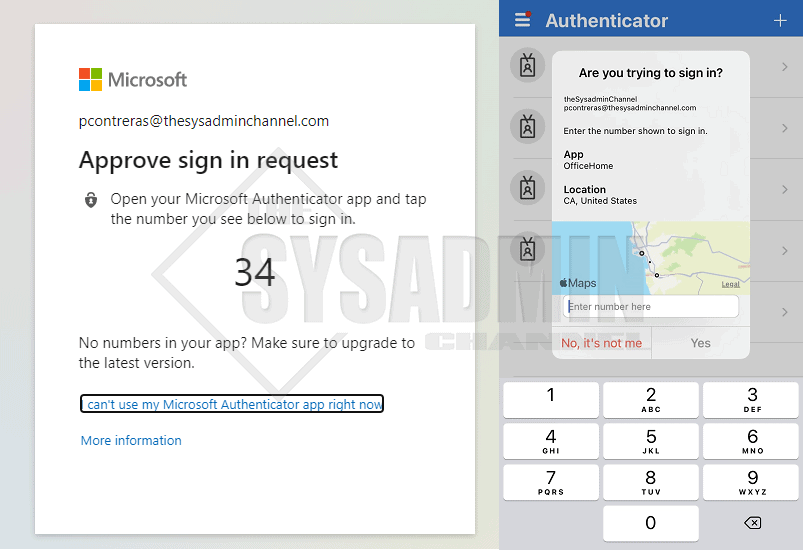
This is using additional context and number matching for added security.
Conclusion
So there you have it. We’ve gone over the steps to enable location rich context for MFA push notifications in your organization and hopefully it’s something you’ll be able to implement fairly soon. It’s great step for security and personally I think it’s great for users as well.
If you enjoyed this and want to see more like it, be sure to check out our Azure posts for more useful content.