The automation of vSphere tasks coupled with the power of Powershell can make any VMware administrator’s job that much easier. In this article I’ll go over step by step how to Install VMware PowerCLI module on your client machine so you can begin the automation rampage.
Install VMware PowerCLI Module From PC With Internet Connection
- From a computer with an internet connection open powershell (preferrably as an administrator)
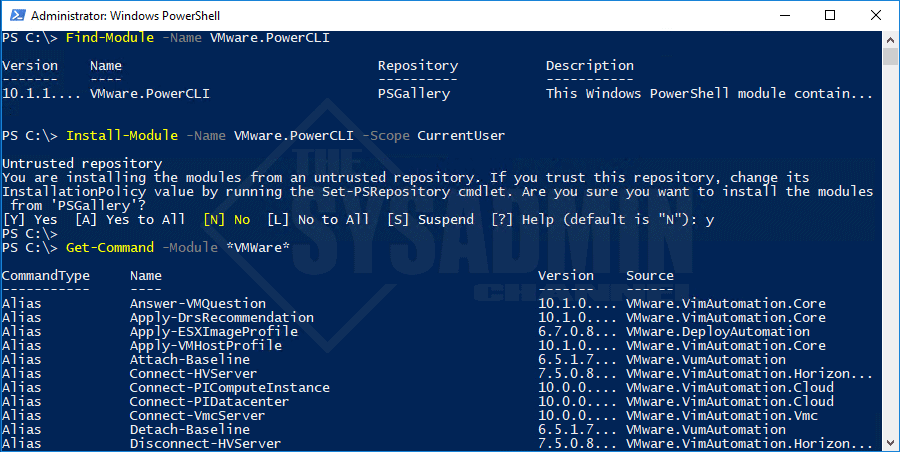
- Find-Module -Name VMware.PowerCLI
- Install-Module -Name VMware.PowerCLI -Scope CurrentUser
- Get-Command -Module *VMWare*
Using the -Scope CurrentUser parameter allows Powershell to install the module without administrator access.
Offline Installation of VMware PowerCLI Module
- Hop on a computer with internet access and open powershell (preferrably as an administrator)
- Find-Module -Name VMware.PowerCLI
- Save-Module -Name VMware.PowerCLI -Path Path
- Copy the files you downloaded to the offline computer
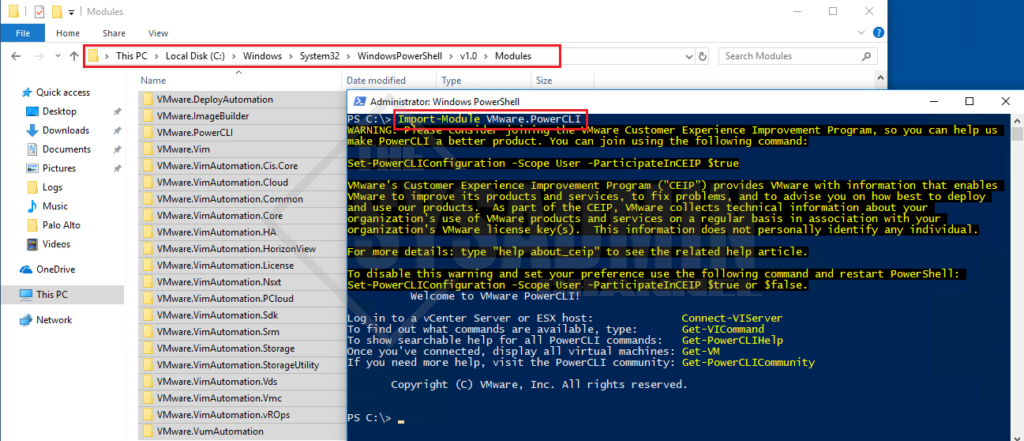
- Move the copied files to C:\Windows\System32\WindowsPowerShell\v1.0\Modules (requires admin rights)
Set-PowerCLIConfiguration Options
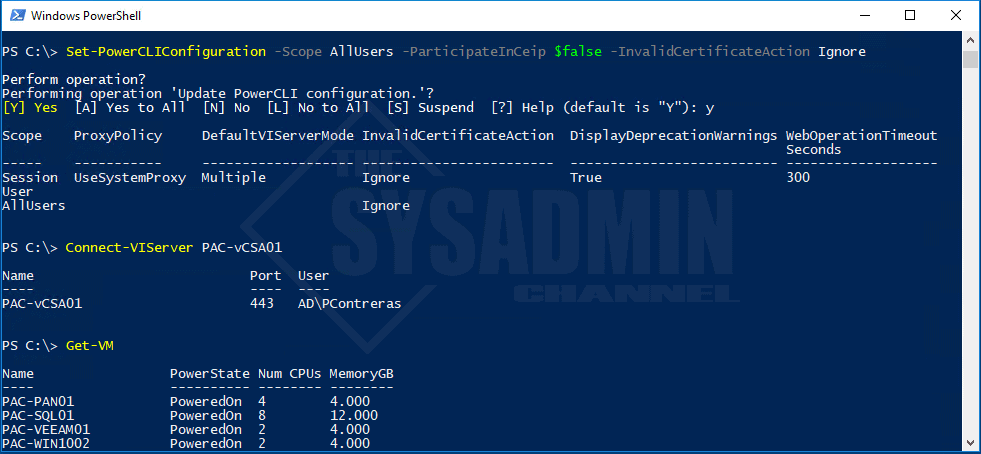
Once we have the module successfully imported we’re going to run a basic configuration command so we’re not prompted to join the VMware’s Customer Experience Improvement Program (“CEIP”) and so it ignores the certificate warning.
#Set the participation to false and ignore invalid certificates for all users
Set-PowerCLIConfiguration -Scope AllUsers -ParticipateInCeip $false -InvalidCertificateAction Ignore

#Connect to our vCenter Server using the logged in credentials
Connect-VIServer PAC-vCSA01

#Get a list of Virtual Machines
Get-VM
Once you’re able to get the list of VMs that means that you’re good to go. Hopefully this article was an excellent tutorial to get you to install vmware powercli. If you have any questions or run into any issues let me know in the comments so I can update it on my end.
On another note, don’t forget to take a look at our Sysadmin channel on Youtube. Be sure to subscribe to get up to date videos on sysadmin related content.


