In the previous versions of Windows, you always had to download and install the Remote Server Administration Tools aka RSAT from Microsoft’s page. Many people complained about the fact that every time you would upgrade to a later build, it would wipe out the tools and you would have to reinstall them. With more recent builds of Windows 10, the remote server administration tools are now part of the build as a Feature and can by accessed by enabling the Feature on Demand. Let’s take a look and install RSAT for Windows 10 Version 1809, 1903 and later using the GUI method as well as using the Powershell method.
Install RSAT for Windows 10 Version 1809, 1903 and Later in the GUI
Although I much prefer the Powershell method, we’ll start off with the GUI method.
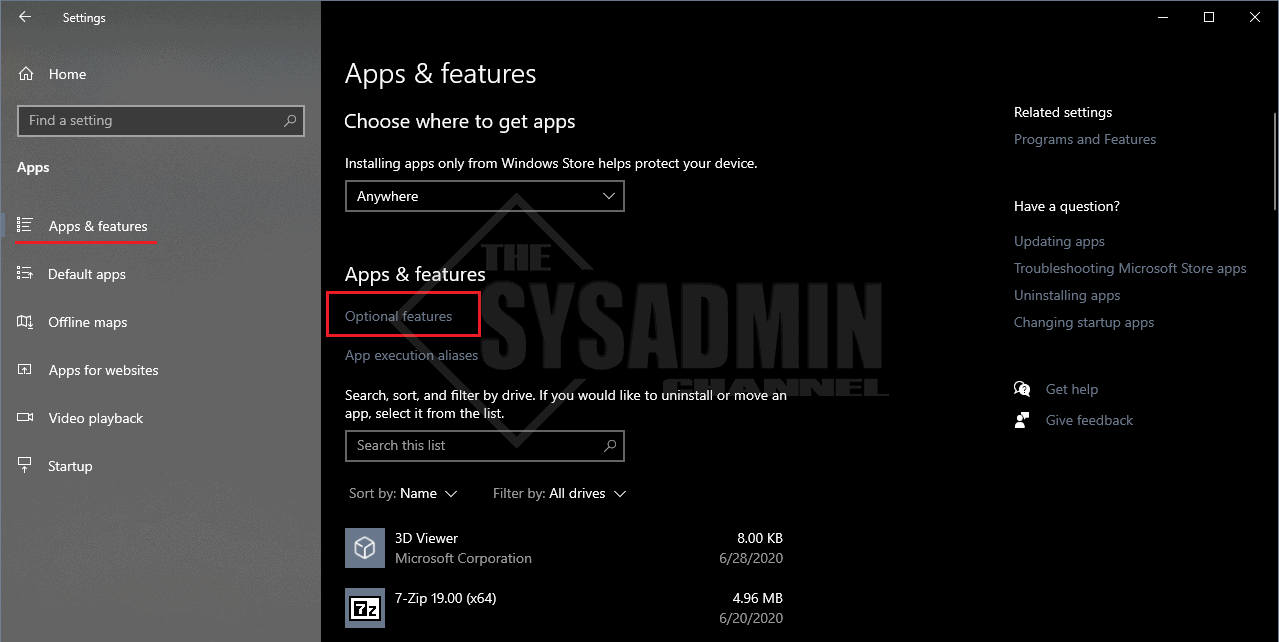
- Open Settings -> Apps -> Optional Features
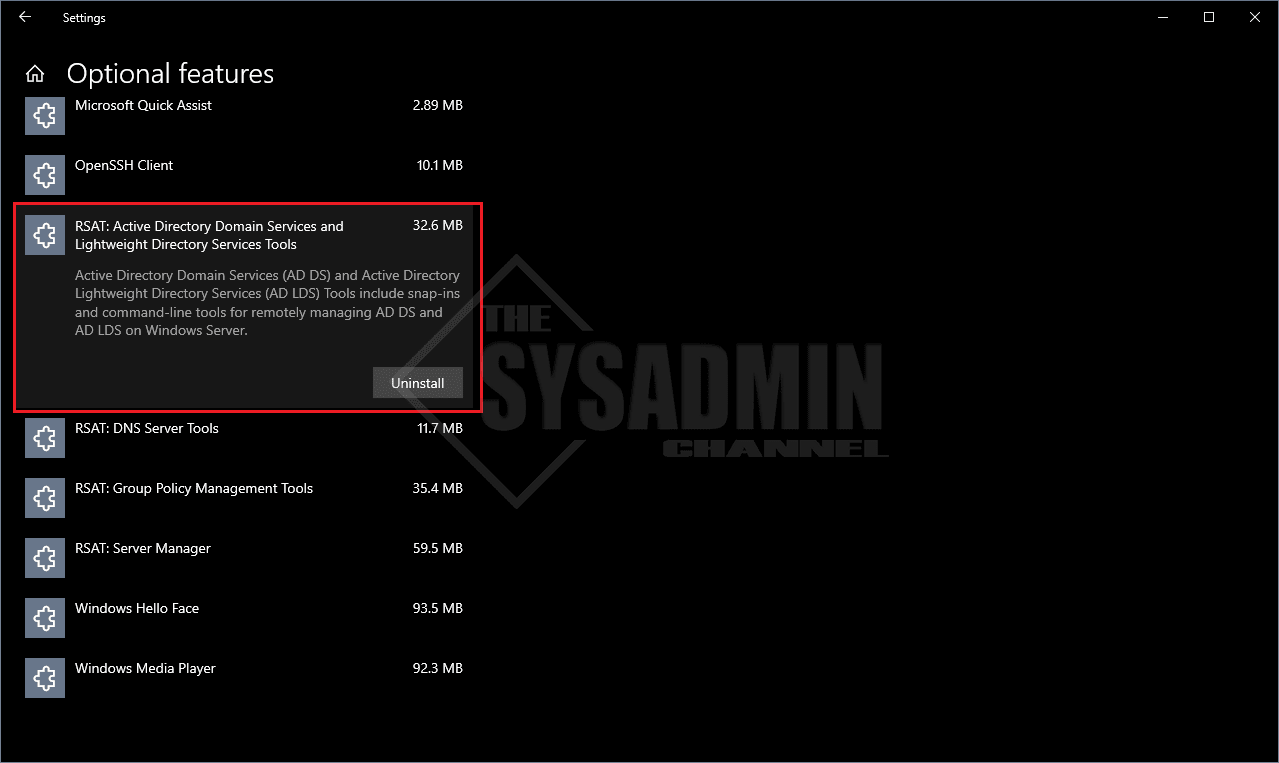
- Select the tools you want to install and click install
Install RSAT for Windows 10 Version 1809, 1903 and Later in Powershell
- Open Powershell as Administrator
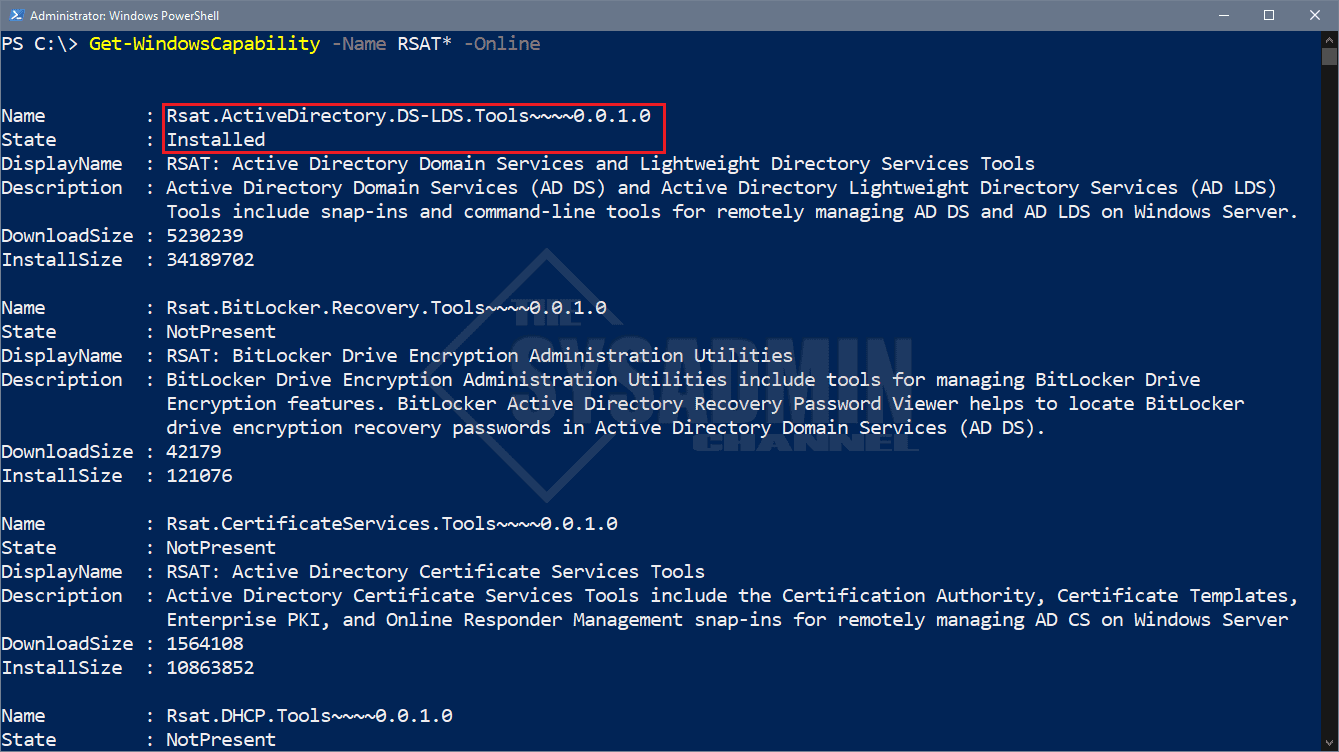
- Type: Get-WindowsCapability -Name RSAT* -Online
- To install the feature, you can either pipe the command to Add-WindowsCapability -or-
- Add-WindowsCapability -Name Name-of-Feature -Online
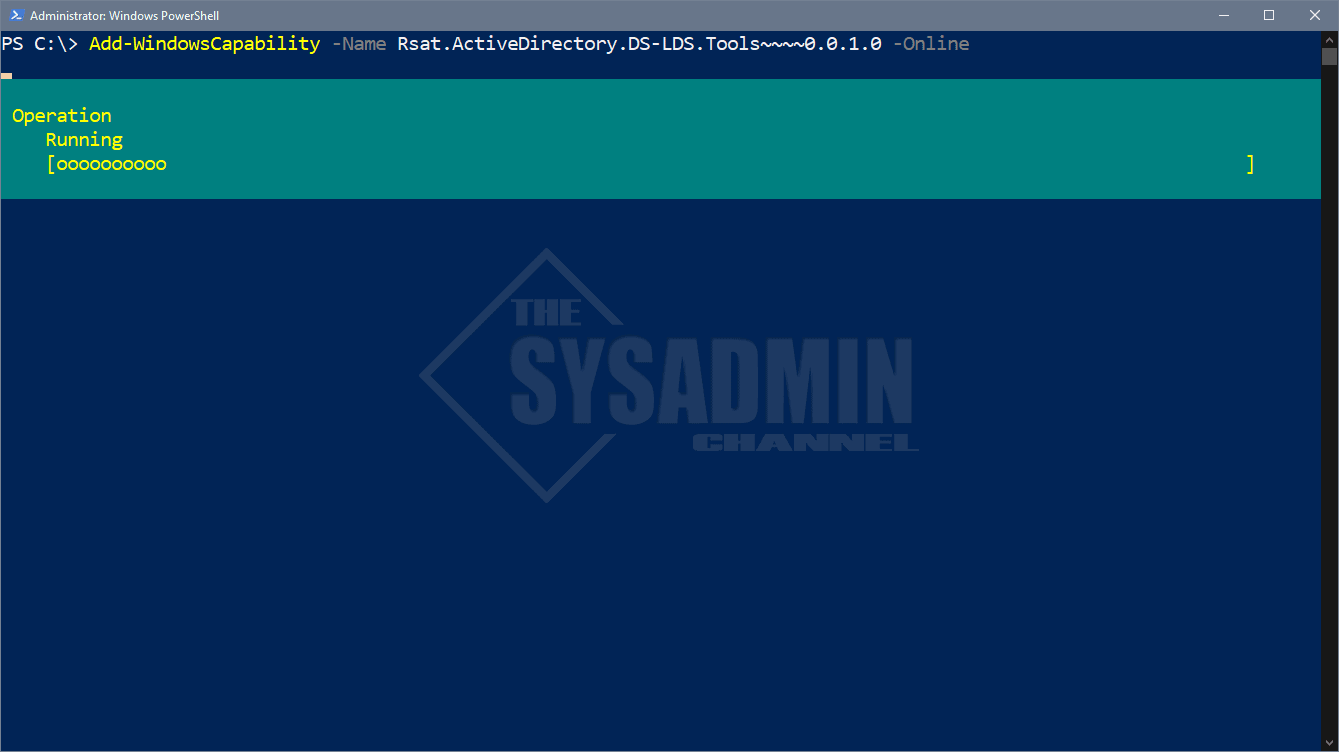
In this example, I’m installing the RSAT: Active Directory Domain Services and Lightweight Directory Services Tools
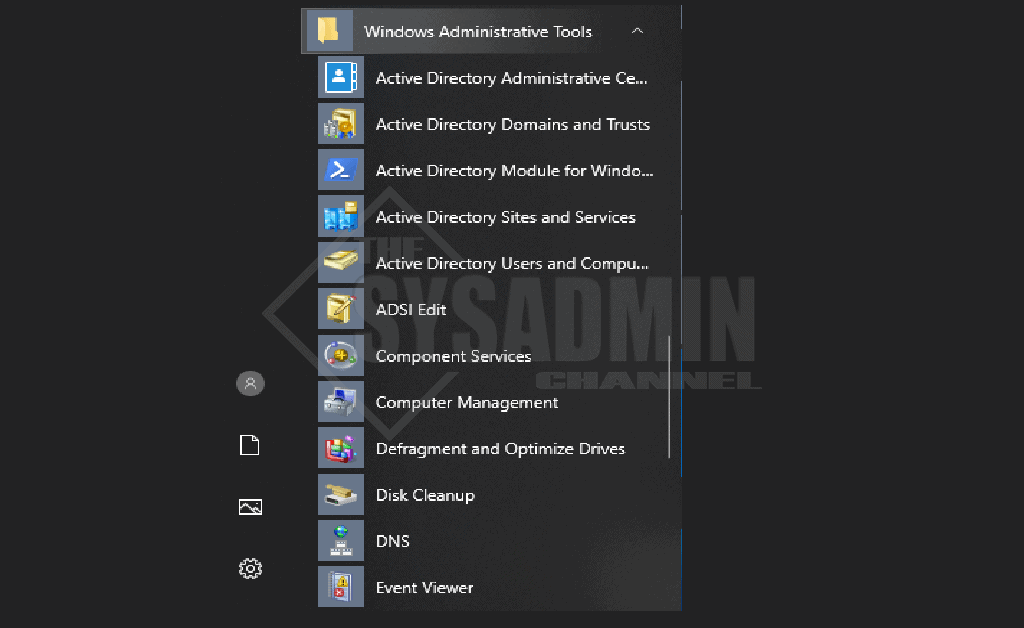
- The items should now be in the Start Menu -> Windows Administrative Tools
I’d love to hear your feedback and I hope you can now add RSAT easily using the Features on Demand. As always be sure to check out our Youbtube Channel https://www.youtube.com/c/theSysadminChannel or if you want more Server Administration content, check out our Server Administration Category. There is a lot of useful information on both links.


Don’t need this weather at this time