In this article we’ll go over the Upgrade to SCCM 1606 from System Center version 2012 R2. In my environment, we were late bloomers when it came to upgrading our System Center environment, mostly because as a sysadmin, we we’re tasked with multiple projects and upgrading our SCCM environment wasn’t that high on the priority list. I’m sure many of you sysadmins who wear multiple hats can relate. However, I am more than happy that I finally was able to upgrade it. The new features in 1606 are awesome and I only wish I had done it sooner.
My lab environment is somewhat a replica to my production environment. Meaning that I have a dedicated domain controller (two actually), a dedicated SQL server running 2012 Standard and a dedicated SCCM server all running Windows Server 2012 R2. I should mention that it’s not necessary to run all of these servers individually and I know many people that are just starting out do not have the resources, I just wanted to provide a layout of my environment so you have an understanding of what I am using. If resources are an issue, you can run all of these on a single server and it should get the job done.
SCCM Upgrade to 1606 Path:
If you’re looking to upgrade to 1606, you can do this in several ways. One way is using the baseline media to upgrade to 1511, then upgrading to 1606. The other method is using the baseline media to upgrade to 1606 directly. In this article, we’re going to use the baseline media to upgrade to 1606 directly.
ADK Version Prerequisite:
SCCM 1606 requires a minimum ADK version of Windows 10 1607. You should be able to check your Programs and Features to see which version you are running. If you’re running ADK version 8.1, you will need to uninstall this version and install the 1607 version.
SQL Server Requirements for SCCM 1606:
Below is the table used for deciding whether you need to upgrade your SQL server to a later version or not.
| SQL Server | CAS | Primary Server | Secondary Server |
|---|---|---|---|
| SQL Server 2016 (Standard, Enterprise) | YES | YES | YES |
| SQL Server 2016 Express | NO | NO | YES |
| SQL Server 2014 SP2 (Standard, Enterprise) | YES | YES | YES |
| SQL Server 2014 SP1 (Standard, Enterprise) | YES | YES | YES |
| SQL Server 2014 Express SP2 | NO | NO | YES |
| SQL Server 2014 Express SP1 | NO | NO | YES |
| SQL Server 2012 SP3 (Standard, Enterprise) | YES | YES | YES |
| SQL Server 2012 SP2 (Standard, Enterprise) | YES | YES | YES |
| SQL Server 2012 Express SP3 | NO | NO | YES |
| SQL Server 2012 Express SP2 | NO | NO | YES |
| SQL Server 2008 R2 SP3 (Standard, Enterprise) | YES | YES | YES |
Disable SQL Replication and Maintenance tasks:
Before you perform upgrade, it’s essential you disable the SQL replication. Not to mention, maintenance tasks such as Backup Site Server, Delete aged client discovery data, Delete aged client operations must be disabled before you upgrade.
Upgrade to SCCM 1606 from SCCM 2012 R2
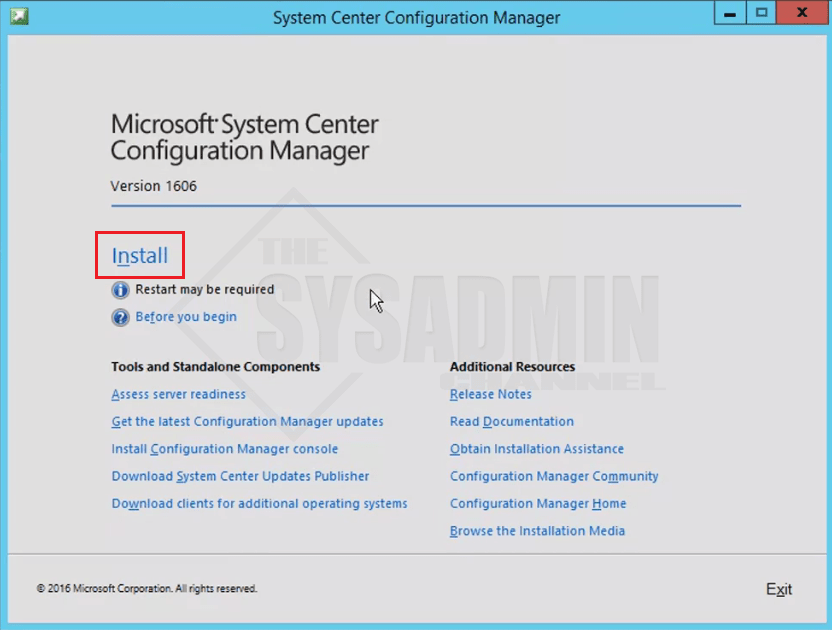
Once you’ve downloaded the SCCM 1606 iso, you can proceed to run the splash.hta to launch the setup. You can verify you are installing the right version because it will show the version. Once launched, click Install.
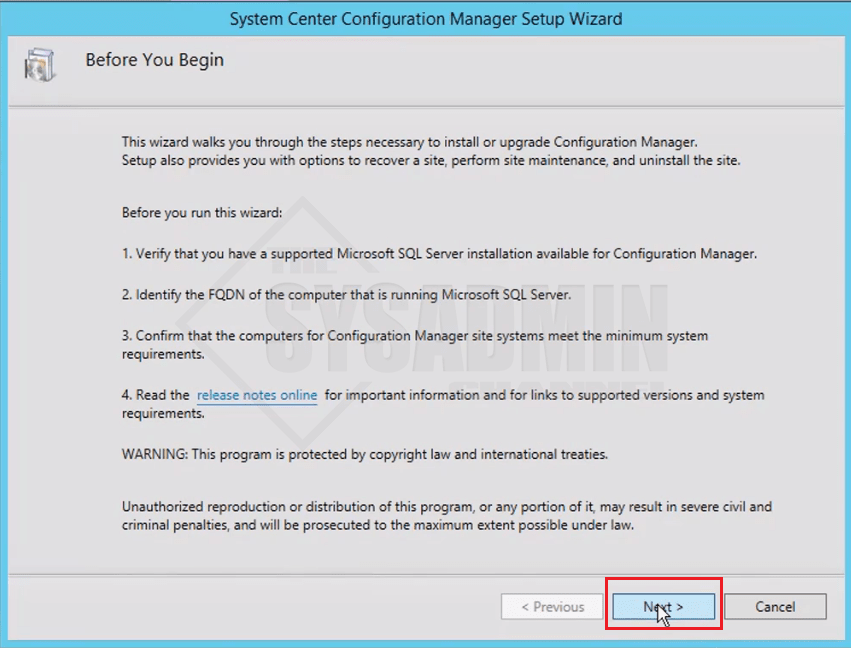
Next we’re presented with some requirements to continue. Since we’re upgrading we should already have that covered so we can comfortably click Next to continue.
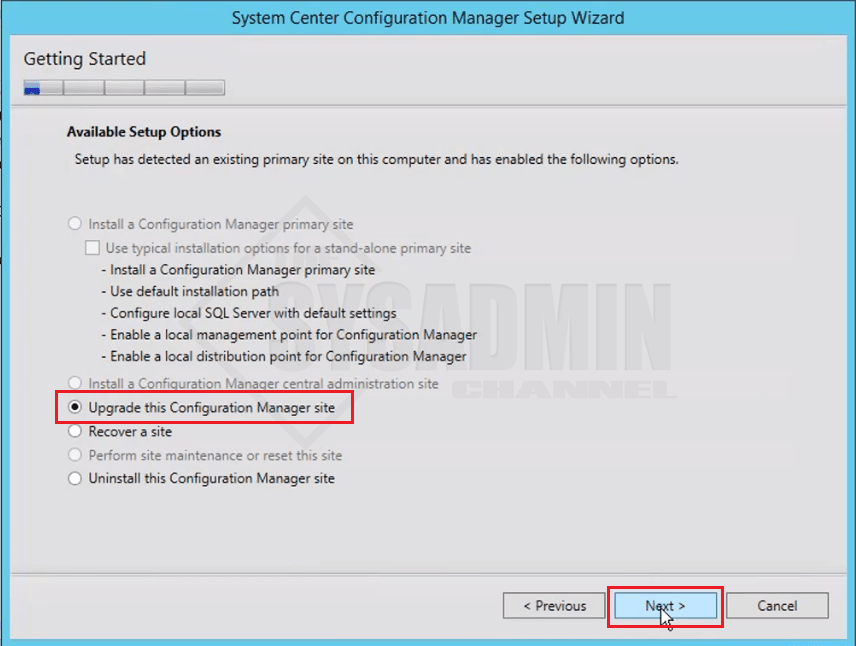
Our goal is to upgrade our Configuration Manager site so our obvious choice to choose the option to do so.
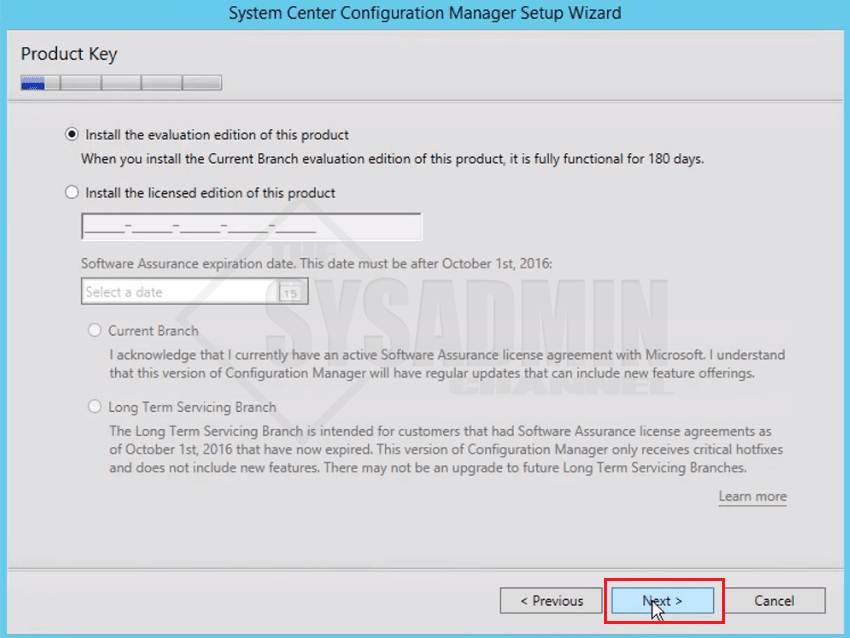
In my lab I do not have a product key so I will opt for the 180 day eval version. If you’re running this in production, you would want to enter in your license key. Either way, you can click next.
Accept all the license terms and EULA’s to proceed.
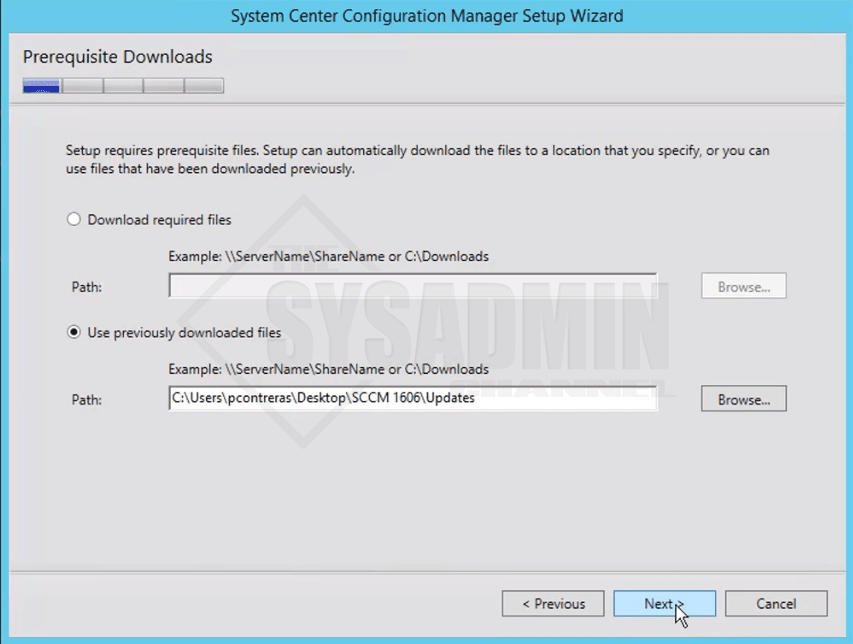
I have already downloaded the updates from a previous install so i’ll enter in the path to those files. Alternatively you can download the files to a directory of your choice.
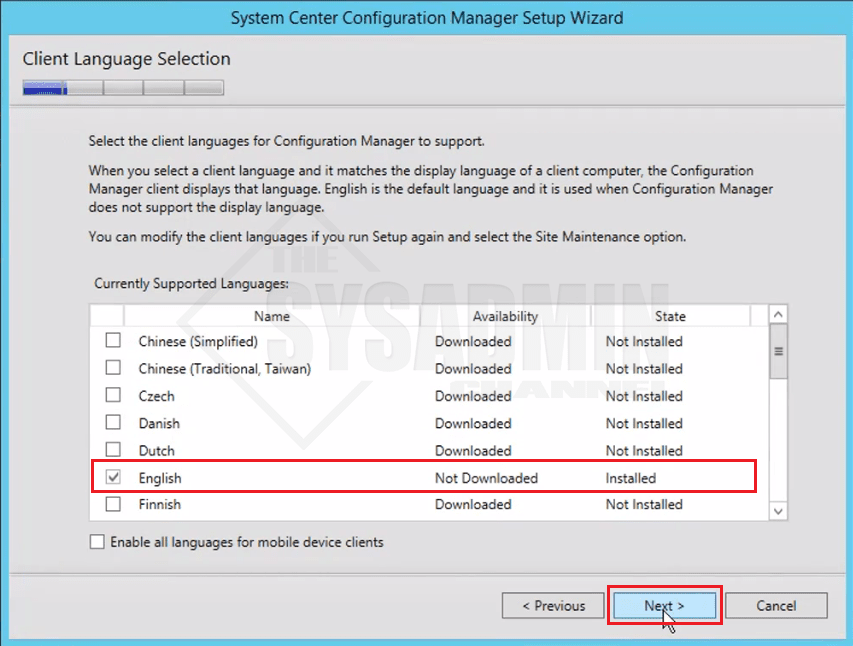
In my case since English is the only language I am going to be using, that is the only selection I am going to make.
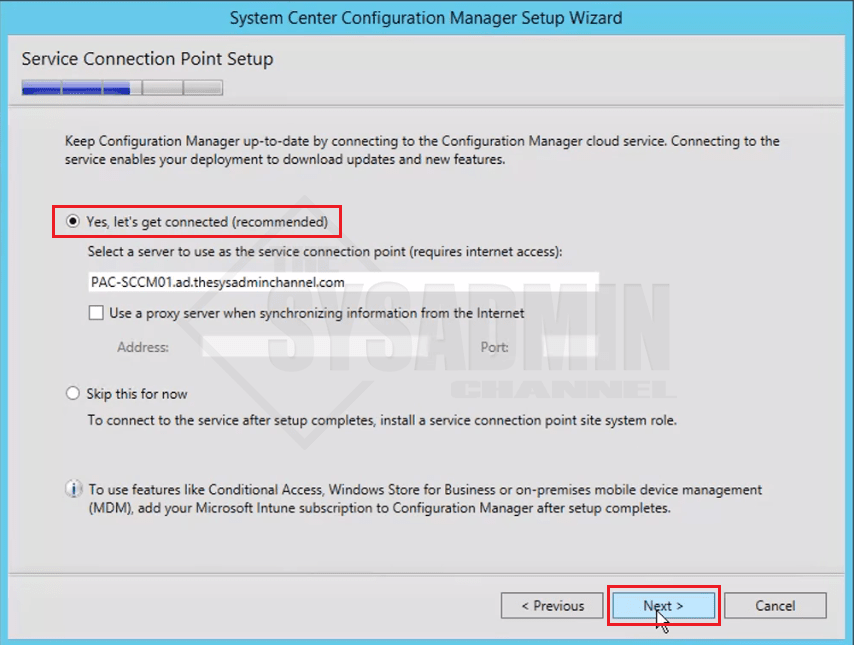
We want to use our Site server as a Service Connection Setup Point so we’ll leave the default selection and click Next.
We’ll select the upgrade and click Next.
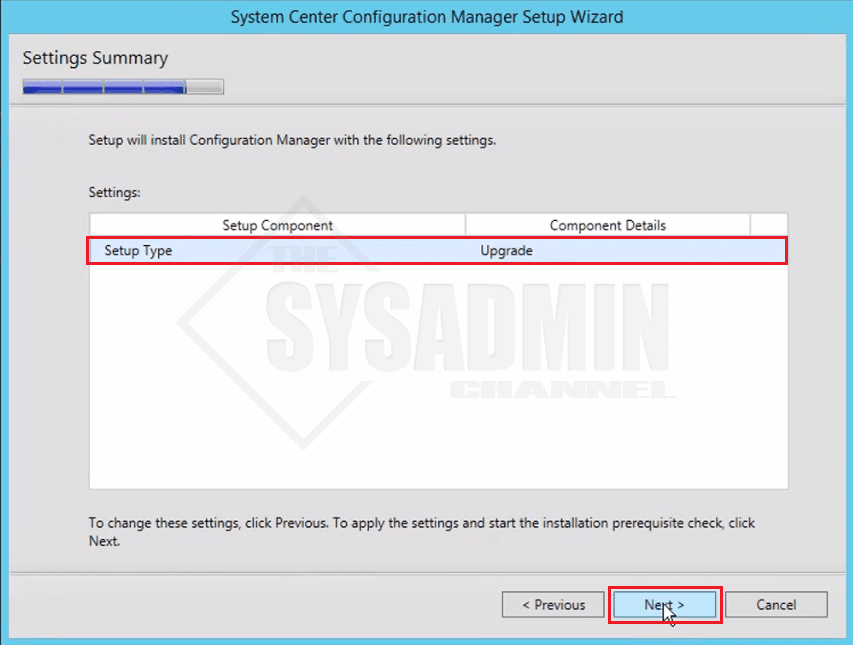
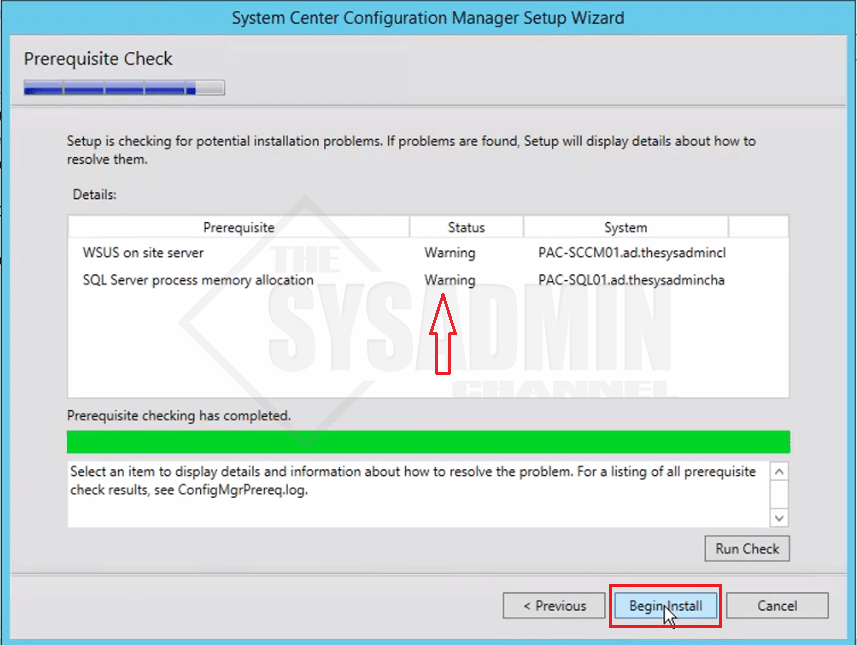
The next screen will run the prerequisite checks to ensure that everything will work prior to actually running the upgrade. As long as you don’t get any critical errors it should go pretty smooth. I believe it won’t even let you continue until all critical prerequisites are fixed. Click Begin Install and we’re off to the races.
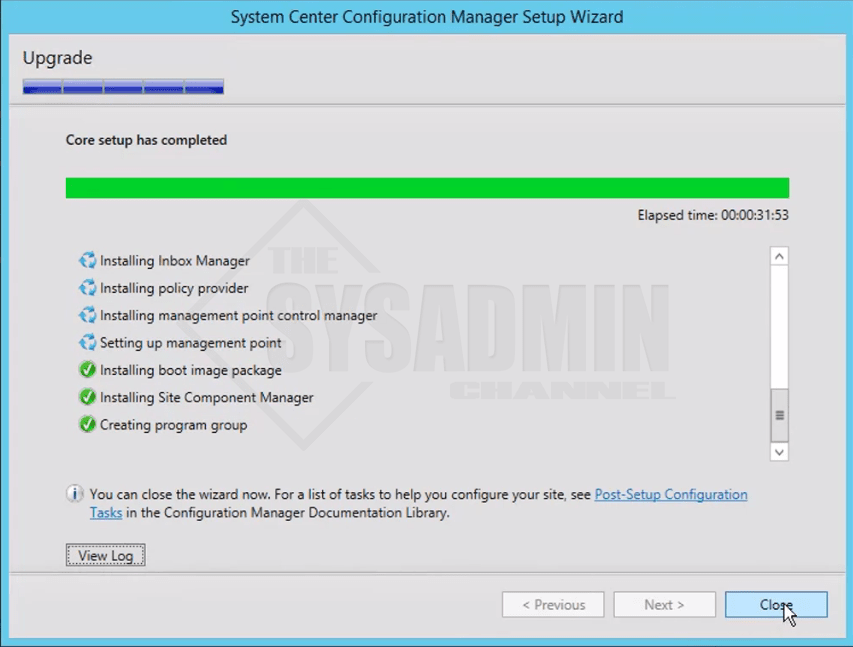
Depending on your hardware and the size of your environment it could anywhere from 20 minutes to about 60 minutes. In my test lab I averaged about 30 minutes and in production it took me about 58 minutes to complete the upgrade.
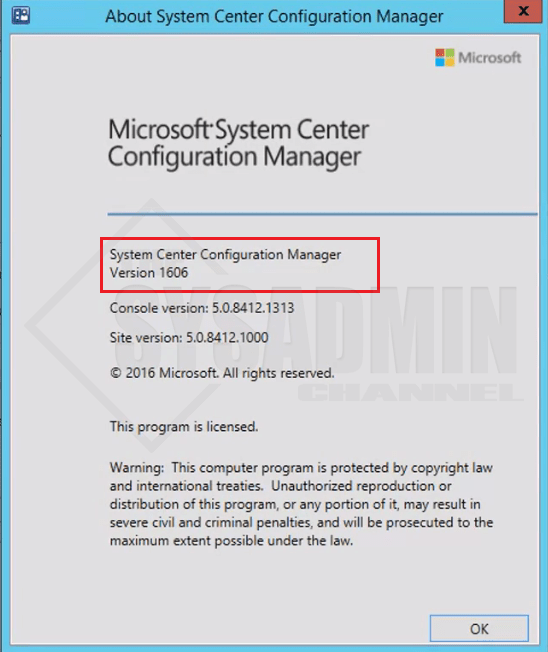
Once you close the installation window, go ahead and open your newly upgraded SCCM 1606 console. You can verify that the installation was successful by going to the top left drop down and selecting About.
Congrats! You successfully completed the Upgrade to SCCM 1606. Hopefully this guide was informative for you and was able to iron out any kinks.
If you’re looking to further your SCCM knowledge I would definitely recommend getting the Learn SCCM in a month of Lunches Book.
Video Of How To Upgrade to SCCM 1606
